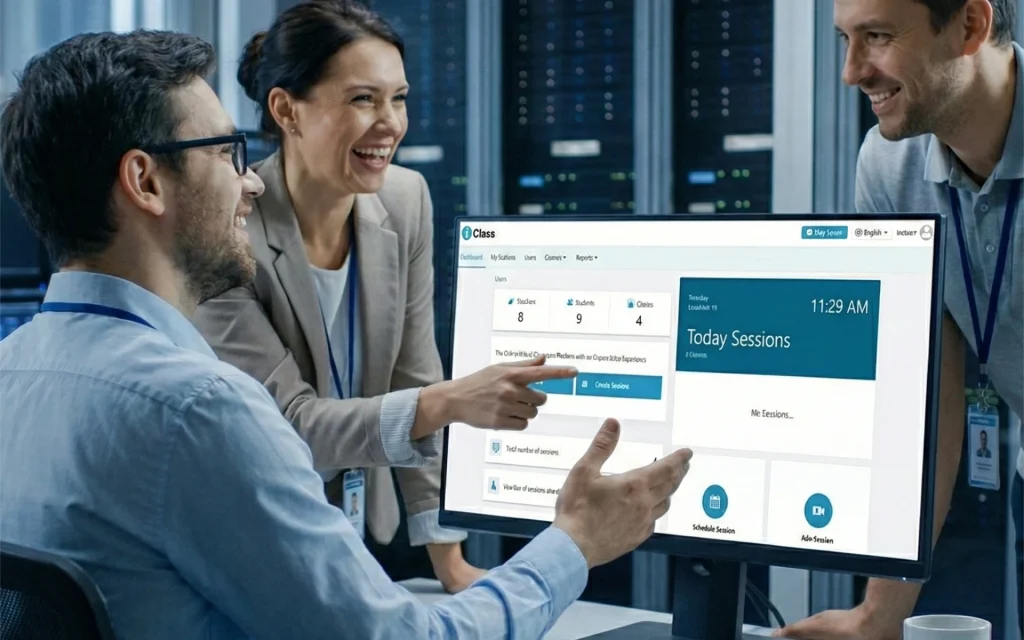
To set up a virtual classroom with inClass, you schedule the session on the cloud platform, invite students through a link, and run the class using 4K video, breakout rooms, and an annotated whiteboard all secured with 256-bit AES encryption.
Most schools don’t fail at online learning because of bad teachers. They fail because of clunky software. A laggy video feed, a whiteboard that won’t load, or a login process that takes ten minutes any one of these can wreck a 40-minute lesson.
This guide walks through the real setup process for inClass, InstaVC’s cloud-based virtual classroom platform, and gives you a framework for how to choose a virtual classroom software for middle school teaching, evaluate a VLE platform for online teaching, and get your staff trained fast.
Why Virtual Classroom Setup Still Trips Schools Up
Here’s the part most guides skip: setup problems are rarely about the software’s feature list. They’re about mismatched expectations.
A school buys a platform built for corporate webinars, then wonders why there’s no grading system. A coaching center buys a basic video tool, then asks why 200 students can’t join one session.
InstaVC has been building video collaboration software since 2008, and its InstaVC Collaboration Suite won the Times Business Award for Best Cloud Solution. That kind of track record matters, because virtual classroom software is infrastructure you don’t want to migrate mid-semester.
inClass is built specifically for education, not repurposed webinar software. That distinction is the first thing to check before you buy anything.
Step-by-Step: Setting Up Your First inClass Session
Here’s the actual sequence, based on the platform’s standard workflow:
Set up IT administration. inClass is designed for effortless deployment, so most schools get it running with minimal IT support no dedicated server team required.
Schedule the class. Use the course scheduling feature to set the date, time, and recurrence, matching it to your curriculum calendar.
Organize your content. Use the content creation and management tools to arrange lesson materials by topic before the class starts.
Add participants. inClass supports unlimited participants, so a single teacher can run a 30-student class or a 300-student lecture without hitting a cap.
Run the live session. Start the class in 4K UHD video with clear audio, so every student even ones with less-than-ideal cameras comes through sharp.
Use the whiteboard. Annotate, draw, and mark up content in real time to keep the lesson interactive instead of a one-way broadcast.
Split into breakout rooms. Move students into small groups for discussion or project work, then bring them back to the main session.
Record and assign work. Record the session for later review, then attach quick assignments or a full questionnaire to check understanding.
Grade and follow up. Use the built-in grading system to score assignments and give feedback without switching to a separate tool.
Not every “feature” on a spec sheet changes your teaching day. These five do.
4K UHD video capability — Sharper video reduces eye strain over long sessions and makes it easier to read handwriting on a physical whiteboard shown on camera.
WebRTC platform with 256-bit AES encryption — AES-256 is the encryption standard formally specified by NIST’s FIPS 197 publication, the same government-grade benchmark used to protect sensitive data, so student records and class recordings stay protected.
Breakout rooms — EDUCAUSE Review’s research on live remote sessions found that structured small-group interaction is one of the strongest drivers of engagement and equity in online classes, not just a nice-to-have feature.
Whiteboard with annotations — Lets a teacher draw, highlight, and explain live instead of just talking over a static slide.
White-labeling — Institutions can brand the platform with their own name and logo, which matters for universities and coaching centers building a distinct online identity.
How to Choose the Right VLE Platform for Online Teaching
If you’re comparing platforms, don’t start with price. Start with these four questions:
Does it scale past 40-50 users? Many free tools throttle group size, which breaks down fast for a full class period or school-wide event.
Is it built for education workflows, not generic meetings? Grading, assignments, and course scheduling should be native features, not workarounds.
What’s the security standard? Ask specifically about encryption “secure” without a named standard like AES-256 is a marketing word, not a spec.
Can IT staff manage it without a full-time hire? Deployment complexity is the single biggest reason schools abandon a platform within the first year.
inClass vs. Generic Video Conferencing Tools
Feature
inClass (Purpose-Built VLE)
Generic Video Conferencing
Video quality
Up to 4K UHD
Typically capped at 1080p
Security
WebRTC + 256-bit AES encryption
Varies, often unspecified
Grading system
Built-in
Not available
Breakout rooms
Yes, education-focused
Sometimes, limited controls
Whiteboard annotation
Yes, interactive
Basic or absent
White-labeling
Available for institutions
Rarely offered
Course scheduling
Native feature
Requires third-party calendar tools
How to Train Teachers to Use Virtual Classroom Software
Buying the platform is the easy part. Getting 30 teachers comfortable with it in one week is harder.
Run a single live demo first. Don’t send a manual show one full class cycle from scheduling to grading.
Assign a “champion” per department. One confident early adopter per subject area answers questions faster than a help desk ticket.
Practice with breakout rooms before the first real class. This feature confuses new users more than any other, because it requires managing two views at once.
Set a shared recording library. New teachers watching one good recorded session learn faster than reading a feature list.
Schedule a 30-day check-in. Most training gaps show up after the first month, not the first day.
Punjab University trained faculty across 40 affiliated colleges on InstaVC’s inClass platform and registered over 10,000 users for online classes and training modules proof that structured rollout works at scale. Similarly, DMI-St. Eugene University connected 120 classrooms across African institutions using inClass, even in low-bandwidth regions, and later added 40 more licenses after seeing results.
Skipping the bandwidth check. Test with your weakest-connection classroom, not your IT office.
Ignoring the recording settings. Confirm recordings save automatically before your first graded session losing one is a real problem.
Not testing breakout rooms in advance. A teacher moving students into groups for the first time live wastes 5-10 minutes of class.
Overlooking white-labeling early. If branding matters to your institution, set it up before launch, not after parents and students already know the default look.
Frequently Asked Questions
FAQWhat is inClass used for?
inClass is a cloud-based virtual classroom platform used by schools, colleges, universities, and training centers to run live classes with video, whiteboards, breakout rooms, grading, and assignment tools in one place.
How to set up a virtual classroom for a middle school?
Start with a platform that supports unlimited participants and simple IT deployment, schedule your first class through the course scheduling feature, and run a practice session with breakout rooms before inviting students.
Why does encryption matter for a virtual classroom platform?
Class sessions often include student data, recorded lectures, and assignment records. A platform using WebRTC with 256-bit AES encryption protects that data to a standard comparable to enterprise-grade security systems.
How to train teachers to use virtual classroom software quickly?
Run one live demo covering the full class cycle, assign a department champion, and schedule a 30-day follow-up check-in instead of relying only on a written manual.
For a broader overview of the technology behind these platforms, read the ultimate guide to virtual classrooms.
Video conferencing software enables people to communicate through live video and audio over the internet without being in the same physical location. Businesses, educational institutions, healthcare organizations, government agencies, and other organizations use video conferencing platforms for meetings, customer communication, training, webinars, remote collaboration, consultations, interviews, and virtual events.
Modern video conferencing software goes beyond basic video calls. Today’s platforms can provide HD video and audio, screen sharing, meeting recording, chat, virtual collaboration, security controls, analytics, integrations, APIs, and flexible deployment options.
This guide explains what video conferencing software is, how it works, the different types available, important features, security considerations, cloud and on-premise deployment, and how organizations can choose the right video conferencing solution.
What Is Video Conferencing Software?
Video conferencing software is a digital communication solution that allows two or more people to communicate using real-time video and audio over the internet or a private network.
Depending on the platform, users can join meetings through a web browser, desktop application, mobile application, meeting room system, or integrated business application.
A modern video conferencing platform may combine:
Video communication
Audio communication
Screen sharing
Meeting recording
Chat
File sharing
Digital whiteboards
Collaboration tools
Meeting analytics
Security controls
APIs and SDKs
Business integrations
Video conferencing software is commonly used for:
Business meetings
Remote and hybrid work
Customer meetings
Online training
Webinars
Interviews
Healthcare consultations
Online education
Government communication
Virtual events
Multi-location collaboration
The right solution depends on an organization’s users, meeting requirements, security policies, infrastructure, integrations, scalability, and budget.
How Does Video Conferencing Software Work?
Video conferencing software captures audio and video from a user’s microphone and camera, processes the media, and delivers it to other participants through a network.
A simplified video conferencing workflow is:
Camera and Microphone → Audio/Video Processing → Network → Conferencing Infrastructure → Participants
Browser-based video communication can use technologies such as WebRTC to support real-time audio and video communication.
The underlying system can involve codecs, signaling, media servers, networking infrastructure, security mechanisms, and bandwidth management.
1. User Authentication
The participant signs into the platform or joins a meeting using a meeting link, authentication method, or organizational identity system.
2. Meeting Connection
The platform establishes the meeting session and determines how participants should connect to the conferencing infrastructure.
3. Audio and Video Capture
The camera captures video while the microphone captures audio. The software processes these streams before transmission.
4. Media Transmission
Audio and video streams are transmitted through the network to the conferencing infrastructure and other participants.
5. Real-Time Processing
The platform manages video quality, audio processing, bandwidth, latency, noise reduction, and other factors affecting meeting quality.
6. Collaboration
Participants can share screens, documents, presentations, chat messages, whiteboards, and other content depending on the platform.
Organizations building or evaluating real-time communication systems can also refer to the W3C WebRTC specification for information about browser-based real-time communication capabilities.
Types of Video Conferencing Software
Organizations can choose from several types of video conferencing solutions depending on their infrastructure and business requirements.
Cloud-Based Video Conferencing
Cloud video conferencing software is hosted by the service provider. Organizations typically access the platform through a browser or application without managing the underlying conferencing infrastructure.
Best suited for:
Remote teams
Small and medium businesses
Distributed organizations
Organizations seeking rapid deployment
Companies that prefer managed infrastructure
Advantages include:
Faster deployment
Easier scalability
Lower infrastructure management
Access from multiple locations
Provider-managed maintenance
On-Premise Video Conferencing
On-premise video conferencing software is deployed within an organization’s own infrastructure or private environment.
Best suited for:
Enterprises with strict security requirements
Government organizations
Healthcare institutions
Organizations with data-control requirements
Businesses with existing private infrastructure
On-premise deployment can provide greater control over infrastructure, network policies, data management, system configuration, and integration.
Hybrid Video Conferencing
Hybrid video conferencing combines cloud and private infrastructure.
This approach can be useful for organizations that want the flexibility of cloud services while retaining control over selected workloads, users, data, or infrastructure.
Industry-Specific Video Conferencing
Some organizations require more than general-purpose meetings.
Healthcare, education, government, retail, financial services, and other industries may require specialized workflows, integrations, compliance controls, or user experiences.
Industry-specific video conferencing software can be designed around these requirements.
Embedded Video Conferencing and Video APIs
Video APIs and SDKs allow organizations and software developers to integrate real-time video communication into their own applications, websites, portals, and workflows.
This approach is useful when video communication needs to become part of an existing digital product rather than operating as a separate meeting application.
Key Features of Video Conferencing Software
When comparing video conferencing platforms, organizations should evaluate both meeting features and the underlying technology.
HD Video and Audio
High-quality video and audio are fundamental to a productive meeting experience.
Look for support for:
HD video
High-quality audio
Adaptive video quality
Noise reduction
Echo cancellation
Automatic gain control
Bandwidth optimization
Screen Sharing
Screen sharing allows participants to present applications, documents, dashboards, websites, presentations, and other digital content.
Meeting Recording
Recording allows organizations to preserve meetings for later viewing, training, documentation, or organizational requirements.
Chat and Collaboration
Meeting chat enables participants to exchange messages, links, files, and other information without leaving the meeting environment.
Virtual Backgrounds
Virtual backgrounds can help users maintain privacy or create a more professional meeting environment.
Breakout Rooms
Breakout rooms allow a larger meeting to be divided into smaller sessions. They are particularly useful for training, education, workshops, and collaborative activities.
Digital Whiteboarding
Digital whiteboards allow participants to brainstorm, explain concepts, and collaborate visually.
Meeting Analytics
Enterprise video conferencing platforms may provide information about meetings, participants, usage, quality, and organizational activity.
Integrations
Video conferencing software can integrate with:
Calendar systems
CRM platforms
Learning management systems
Productivity applications
Communication platforms
Identity providers
Business applications
APIs and SDKs
Organizations that need embedded communication can use APIs and SDKs to integrate video functionality into their own applications.
Benefits of Video Conferencing Software
Supports Remote and Hybrid Work
Video conferencing enables employees and teams to communicate regardless of their physical location.
Reduces Business Travel
Organizations can conduct meetings, consultations, training sessions, and presentations remotely, reducing the need for travel.
Improves Collaboration
Teams can combine video, audio, screen sharing, messaging, and collaborative tools within one communication environment.
Expands Customer Reach
Businesses can communicate with customers, partners, and prospects across different locations without requiring physical meetings.
Enables Industry-Specific Communication
Video conferencing can support workflows in education, healthcare, government, retail, and other sectors.
Supports Business Continuity
Organizations can continue communication when employees cannot work from a common physical location.
Cloud vs On-Premise Video Conferencing
Choosing between cloud and on-premise deployment depends on an organization’s infrastructure, security, scalability, and operational requirements.
Factor
Cloud
On-Premise
Deployment
Faster
Requires infrastructure
Infrastructure control
Lower
Higher
Scalability
Generally easier
Depends on infrastructure
Maintenance
Provider-managed
Organization-managed
Customization
Platform-dependent
Greater control
Data control
Provider environment
Organization-controlled
Best suited for
Fast deployment and scalability
High-control environments
There is no universally correct deployment model. Organizations should select the approach that fits their technical, operational, security, and compliance requirements.
How Secure Is Video Conferencing Software?
Security should be one of the primary considerations when selecting an enterprise video conferencing platform.
Organizations should evaluate:
Encryption
Secure authentication
Role-based access
Meeting passwords
Waiting rooms
Participant controls
Data protection
Single sign-on
Audit logs
Administrative controls
Data retention policies
Network security
API security
Organizations working with real-time communication technologies should also consider relevant networking and communication standards. The IETF publishes technical standards and specifications covering many internet communication technologies.
Security requirements vary between industries. Healthcare, government, financial services, and other regulated environments may require additional controls.
How to Choose the Right Video Conferencing Software
Choosing a video conferencing platform should begin with business requirements rather than a feature checklist alone.
Step 1: Identify Your Users
Determine who will use the platform:
Employees
Customers
Students
Teachers
Doctors
Patients
Government officials
Partners
Developers
Step 2: Define Meeting Requirements
Consider:
Number of participants
Meeting duration
Meeting frequency
Recording requirements
Screen sharing
Breakout sessions
Webinars
Large events
Meeting room requirements
Step 3: Evaluate Deployment
Decide whether your organization requires:
Cloud
On-premise
Hybrid
Embedded video
Step 4: Evaluate Security
Review authentication, access controls, encryption, administration, data management, and other security requirements.
Step 5: Check Integrations
Make sure the platform can connect with the business applications your organization already uses.
Step 6: Evaluate Scalability
The platform should support current requirements while allowing you to add users, meetings, locations, and applications as your organization grows.
Step 7: Consider Total Cost
Don’t evaluate software only by its subscription price.
Consider:
Licensing
Infrastructure
Implementation
Maintenance
Training
Integrations
Support
Hardware
Network requirements
Video Conferencing Software for Different Industries
Different industries have different communication requirements.
Business and Enterprise
Businesses use video conferencing for internal meetings, sales presentations, customer communication, interviews, training, and hybrid work.
Enterprise environments may additionally require SSO, centralized administration, analytics, APIs, integrations, and advanced security controls.
Education
Educational institutions can use video conferencing for:
Virtual classrooms
Remote lectures
Faculty meetings
Online training
Student collaboration
Parent-teacher meetings
Distance learning
Education-focused platforms may also need attendance management, classroom controls, recording, and learning system integrations.
Healthcare
Healthcare organizations can use video communication for:
Virtual consultations
Remote specialist communication
Patient follow-ups
Medical collaboration
Telehealth workflows
Healthcare deployments should consider privacy, security, authentication, data handling, and integration requirements.
Government
Government organizations may require highly controlled communication environments for meetings, consultations, remote offices, and interdepartmental collaboration.
Important considerations can include security, access control, infrastructure control, data management, and deployment flexibility.
Retail
Retail organizations can use video communication for:
Store-to-head-office communication
Customer consultations
Employee training
Remote assistance
Multi-location collaboration
InstaVC Video Conferencing Solutions
InstaVC provides video communication solutions designed for different business and industry requirements.
Its solution portfolio includes video meeting, collaboration, communication, education, healthcare, retail, and video API capabilities.
inMeet
inMeet is designed for online video meetings and collaboration, supporting organizations that need virtual meetings and remote communication.
inLynk can support communication and collaboration requirements across organizational environments.
inAPI
Organizations that want to add video communication to their own applications can explore video API capabilities for embedded communication and application integration.
Video Conferencing Software vs Video Meeting Software
The terms video conferencing software and video meeting software are often used interchangeably, but they can describe slightly different scopes.
Video meeting software generally focuses on conducting online meetings.
Video conferencing software can refer to a broader communication platform that includes meetings along with collaboration, recording, administration, integrations, APIs, analytics, room systems, and industry-specific capabilities.
For organizations, the important consideration is not the terminology but whether the platform provides the capabilities required for their communication workflows.
Video Conferencing Software vs Traditional Meetings
Traditional in-person meetings require participants to be physically present in the same location.
Video conferencing allows participants to communicate remotely while seeing and hearing each other in real time.
Requirement
Traditional Meeting
Video Conferencing
Physical presence
Required
Not required
Travel
Often required
Usually not required
Remote participation
Limited
Built in
Screen sharing
Additional equipment
Usually available
Recording
Additional setup
Often built in
Multi-location meetings
More difficult
Easier
Scalability
Location-dependent
Network/platform-dependent
Video conferencing does not completely replace face-to-face communication. Instead, it provides organizations with another way to communicate when physical meetings are impractical or unnecessary.
What Should Businesses Look for in Video Conferencing Software?
Modern businesses should evaluate video conferencing software based on more than basic video calling.
Key areas include:
AI-assisted meeting capabilities
Intelligent noise reduction
Automated transcription
Meeting summaries
Advanced analytics
Secure authentication
API and SDK availability
Cloud and on-premise deployment
Hybrid work support
Interoperability
Integration capabilities
Accessibility
Scalability
Enterprise administration
AI features should complement the meeting experience rather than replace the fundamentals of reliable video, audio, security, and usability.
Frequently Asked Questions
FAQWhat is video conferencing software?
Video conferencing software allows people in different locations to communicate using real-time video and audio over the internet or a private network. Modern platforms may also provide screen sharing, recording, messaging, collaboration, security, analytics, and integrations.
What is the best video conferencing software for businesses?
The best solution depends on the organization’s requirements. Businesses should evaluate participant capacity, video and audio quality, security, integrations, deployment options, administration, scalability, and total cost before selecting a platform.
What features should video conferencing software have?
Important features include HD video and audio, screen sharing, recording, chat, collaboration, meeting controls, security, administration, integrations, analytics, and API capabilities.
Is cloud or on-premise video conferencing better?
Neither option is universally better. Cloud platforms can simplify deployment and scalability, while on-premise platforms can provide greater infrastructure and data control. The right choice depends on organizational requirements.
Is video conferencing secure?
Video conferencing can be secure when the platform and organization implement appropriate authentication, access controls, encryption, administrative policies, and data protection measures.
Can video conferencing be integrated into other applications?
Yes. Video APIs and SDKs can allow organizations to integrate real-time video communication into websites, applications, portals, healthcare systems, education platforms, and other software products.
Can video conferencing support hybrid work?
Yes. Video conferencing is one of the core technologies used by hybrid organizations to connect employees working from offices, homes, meeting rooms, and other locations.
What is the difference between video conferencing and video calling?
Video calling generally describes a direct video communication session between individuals or small groups. Video conferencing usually refers to a broader meeting environment supporting multiple participants and collaboration capabilities.
Classroom management software is a secure, cloud-based platform that allows educators to run live virtual lessons, monitor student attendance, share curriculum resources, and grade assignments from a single centralized web interface.
Imagine walking into a traditional school building. You see physical classrooms, administrative offices, and a quiet library. Modern education requires translating this entire physical building into a functional digital space. If you are learning about this type of technology for the first time, it helps to start with the core problem it solves.
Teachers today face a massive hurdle. They must keep remote students focused, engaged, and organized without sharing the same physical room. When students are scattered in different locations, staying organized becomes incredibly difficult. Physical classrooms naturally command a student’s attention. Digital classrooms require intentional software workflows to keep students from getting distracted.
Basic video calling tools are no longer enough. Standard video programs only offer a live video feed. They do not handle daily paperwork, student tracking, lesson materials, or grading workflows that a real school needs to survive. Because of this massive gap, specialized classroom management software is now a strict requirement for modern educators.
A true virtual classroom platform acts as a complete digital school. It replaces outdated physical limitations with a highly flexible online ecosystem. It gives administrators, teachers, and students their own dedicated portals to manage their daily responsibilities without confusion.
How the Ecosystem Operates: Three Core Portals
To understand this educational technology completely, you must look at how the daily school operations break down. A proper platform handles operations through three distinct user logins.
1. The Administrator Portal
Before a teacher even starts a live video call, an administrator must set up the digital school environment. This person logs in and creates a unique web domain for the school, such as “school.inclass.vc”. They build a master directory by importing teacher and student details. The administrator assigns specific teachers to specific grades and maps out the subjects. They can even make certain special classes invisible to the general student body if a small group needs private tutoring.
2. The Teacher Portal
Teachers log into their own dashboard to see the exact classes and subjects the admin assigned to them. They can schedule recurring live sessions for their students. Inside their subject folders, teachers create lesson topics and upload materials like PDFs, videos, or presentation files for students to study.
3.The Student Portal
Students use the school’s unique web domain to log into their personal dashboard. Their homepage shows their daily attendance ratio, recent topics covered, and any pending homework. When it is time for class, the student simply clicks a link to join the live session securely.
Core Features That Solve Modern Learning Challenges
Not all software options are built the same way. A reliable platform combines smooth video communication with deep administrative tools. Here is exactly what school leaders look for when choosing a solution:
Bulk Directory Imports: Administrators can upload massive lists of students quickly using a simple Excel spreadsheet instead of typing names one by one.
Interactive Whiteboards: The platform includes live drawing and annotation tools. This makes a remote math or science lecture feel as interactive as an in-person class.
Multi-Camera Feeds: A teacher can connect up to four physical cameras simultaneously from a single login. One camera focuses on the teacher’s face, one points down at a physical textbook, and another focuses on a whiteboard. This happens without needing expensive hardware switchers.
Automated Assessment Engines: Teachers can build multiple-choice quizzes and schedule them to open at an exact time. Students can also complete descriptive assignment help by typing answers or uploading a scanned photo of their handwritten work.
For a deep dive into how universities use these structural layouts to manage thousands of students simultaneously, read our ultimate university guide.
Comparing Hosting Options for Schools
When an institution decides to deploy this technology, they must choose how to store and run the software. In the software industry, this choice is split between cloud hosting and on-premise hosting.
According to global educational data compiled by the National Center for Education Statistics, the vast majority of schools choose cloud-based systems because they require zero local servers. However, technology research from Gartner indicates that on-premise hosting remains a critical requirement for specific government and defense sectors that demand complete data isolation.
Hosting Feature
Cloud-Based Deployment
On-Premise Deployment
Storage Location
Hosted on secure remote servers managed entirely by the software vendor.
Hosted locally on the school’s own physical hardware servers.
Setup Speed
Instant deployment with zero extra hardware needed.
Slower setup that requires an internal IT team to configure.
Data Control
The software company manages privacy protocols and updates.
The school maintains 100% manual control over all internal data.
Accessibility
Users can log in easily from any web browser worldwide.
Users often need direct access to the school’s local secure network.
The Financial Advantage: Concurrent Licensing Explained
Traditional video software companies force schools to buy a separate license for every single student and teacher on the roster. If a school has 10,000 employees and students, they must buy 10,000 individual user accounts. This model wastes a massive amount of budget because not everyone is on a video call at the exact same moment.
Modern platforms fix this problem by using a concurrent licensing model. This model sells “ports” or simultaneous channels instead of named user licenses.
Industry standards show that, on average, only about 10% of an organization’s total user base will ever be on a live video call at the exact same time. With concurrent licensing, a school with 10,000 total users only needs to buy 1,000 concurrent lines. Anyone in the school can start a meeting whenever they need to, as long as the total number of active users across the whole school does not exceed the 1,000-port limit at that specific second. This single change cuts annual technology expenditure significantly while opening video access to the entire student body.
Data security is a non-negotiable requirement for modern schools. You cannot risk exposing student identities, home addresses, or test scores to external internet hackers. Generic video tools often suffer from security flaws where uninvited guests can guess a meeting link and join a live class infinitely. Dedicated classroom platforms solve this by completely blocking public sign-ups. Only students whose accounts were manually generated by the school administrator can enter a classroom link.
Furthermore, schools must look for specific legal compliances when selecting a software vendor:
AES 256-Bit Encryption: This mathematical protocol locks live video feeds and student records, scrambling the data so hackers cannot read it.
CMMI Level 3 Rating: This certification proves that the software vendor follows mature, audited, and strictly engineered coding practices to prevent bugs.
GDPR & SOC2 Compliance: These global legal frameworks ensure the software respects personal data privacy rights and passes regular external security audits.
It is a comprehensive digital platform that helps schools run live virtual lessons, automatically track student attendance, distribute learning materials safely, and manage student grades from a single dashboard.
How to transition a traditional school to a virtual classroom?
An administrator creates a dedicated digital school domain. They upload the master student list via a spreadsheet, map out the required subjects for each grade, and issue secure login details to the staff so teachers can begin hosting scheduled live video classes.
Why is data encryption vital for online schools?
Encryption acts as an advanced digital lock. Using standards like AES 256-bit encryption ensures that student profiles, live camera feeds, and exam scores are kept safe from unauthorized access on the public internet.
Using a video API saves businesses months of work and thousands of dollars by plugging ready-made, secure video tools right into an app. Building from scratch takes too much time, costs too much money, and creates too many bugs to fix later.
Many companies think they should build their own video tools so they can own all the code. They hire a team of developers and start writing the software. Very quickly, they hit a massive wall. Building live video technology is incredibly difficult and expensive.
Research indicates that building a custom video conferencing application from scratch takes a team of developers six to nine months. According to industry development experts, a basic video app starts at $30,000, while a fully featured platform with screen sharing, high-definition video, and secure encryption easily exceeds $100,000 to $200,000 in initial development costs.
You pay developer salaries every week. You pay for the cloud servers to test the heavy video streams. You pay for expensive software licenses. The bills pile up fast. Even after you spend $150,000, you do not have a perfect product. Developers write massive amounts of code to handle video streams, audio sync, and data transfers. This code breaks easily. The video drops out. The audio lags behind the picture.
According to industry standards, buying an existing video api cuts your launch time down to just a few days. You skip the massive bills. You pay a low monthly fee and get instant access to powerful tools.
Let us define the core concept clearly so you understand what is a video conferencing api. People often ask, what is video api? It is a set of digital building blocks. It provides the core code needed to add live video calls into your own website quickly.
Think of it like a car engine. You can build your own engine from raw metal parts. You spend years testing it to make sure it runs safely. Or, you can buy a powerful, tested engine from a major factory and drop it right into your car frame. The API acts as the factory engine. You plug it into your app, and your users get live video instantly.
Your users never have to leave your website to use a different app. They stay on your page. They click one button, and the camera turns on. To see how this fits into your overall setup, read our guide on choosing communication tools.
Buy vs. Build: A Clear Comparison
Business leaders need clear facts to make good decisions. Look at the numbers below to see the exact differences between writing your own code and buying a ready-made solution.
Feature
Building From Scratch
Using a Video API
Time to Launch
6 to 9 months
2 to 5 days
Upfront Cost
$100,000 – $200,000+
Low monthly fee
Maintenance Work
Your team fixes all bugs
Provider handles all updates
Server Costs
You pay for heavy data use
Included in your plan
Security Setup
You write the encryption code
Military-grade encryption built-in
The Hidden Trap of Video Maintenance
Many companies try to build their own video tools and succeed at first. The tool works for a few weeks. But then the software breaks. Web browsers update their rules. Mobile phones change their operating systems. Suddenly, your custom code stops working.
Experts call this problem “technical debt.” According to research from tech authorities like Gartner and Forbes, technical debt acts as a silent company killer. Maintaining a custom video tool and fixing old code can consume up to 40% of a company’s entire IT budget. Furthermore, software maintenance often takes up 75% of a developer’s total effort over the lifespan of an application.
Your team must fix video lag, handle heavy server loads, and update security protocols constantly. They stop building new features for your main product because they spend all day fixing the video calls. When you buy a ready-made solution, the provider handles all of this work. Your team focuses on your actual business and leaves the video maintenance to the experts.
You might wonder how the video actually travels across the internet so fast. Most modern video tools rely on a standard called WebRTC (Web Real-Time Communication). According to the MDN Web Docs by Mozilla, WebRTC is an open technology that lets web browsers talk to each other directly. Before this existed, people had to download clunky software and plugins to make a video call. Now, the browser does the work.
Working directly with raw WebRTC code remains very hard. It drops calls frequently if you do not program it perfectly. It struggles with bad internet connections. A good platform wraps around this raw code. It smooths out the rough edges. It ensures the video works perfectly on phones, tablets, and computers without extra effort from your team. You get the power of WebRTC without the headaches.
Fast Setup and Developer Success
Developers love tools that make their jobs easier. Writing raw video code from scratch frustrates even the smartest engineers. It requires deep knowledge of complex internet networking rules.
A professional platform removes this frustration. The provider hands your developer a simple instruction manual and secure API keys. Your developer copies a few lines of code and pastes them into your website. The platform handles the heavy lifting in the background, including managing automated webhooks that trigger actions when a call ends. The video feed goes live in a matter of days. Your tech team looks like heroes, and your product reaches the market months ahead of schedule.
Bulletproof Security and Privacy
According to industry standards, video calls must lock down user data. If you build your own tool, you must build the security walls yourself. You must encrypt the data perfectly. You must pass strict privacy laws like GDPR and HIPAA in different countries. This takes months of legal and technical work.
Good platforms include strict security right away. They use strong 256-bit AES encryption. They comply with global privacy laws automatically. You protect your users instantly without hiring a massive security team. Hackers cannot steal your video streams. Check out how to protect user data in our review of secure video protocols.
Today, people do everything on their phones. Your video tool must work flawlessly on mobile devices. Building a video tool for a web browser is hard. Building it for mobile apps is even harder. Apple phones use different rules than Android phones. You must write completely different code for each type of phone.
A ready-made engine solves this problem instantly. The provider gives you code that works everywhere. You drop the code into your mobile app. The video call works perfectly on every single phone. You do not need to hire separate Apple and Android video experts.
Keeping Users on Your Website
User experience drives your business success. If a customer struggles to join a video call, they leave. They go to a competitor. When you force users to open a new app like Microsoft Teams or create a new account just to talk to you, you lose them.
A plug-in solution keeps the user on your website. The process feels completely smooth. The user clicks one button. The camera turns on. The conversation starts.
You also get to keep your own branding. You change the colors, fonts, and logos on the video screen. The video call looks exactly like your own brand, not a generic third-party tool. This simple workflow builds trust quickly. It keeps the customer happy. It increases your sales and improves your support team’s success rate.
Concurrent Licensing vs. Per-User Billing
When you look at costs, you must look at how video companies charge you. Most standard tools charge a “per-user” fee. If you have 1,000 employees or students, you pay for 1,000 licenses every month, even if only 50 people use the video tool at the same time. This wastes massive amounts of money.
Smart platforms use a Concurrent Licensing model. This means you only pay for the number of people actively using the video rooms at the exact same moment. If you have 1,000 employees but only 50 hold meetings at the same time, you only pay for 50 licenses. This pricing model completely changes your budget. It allows you to scale your business without punishing you with unfair fees.
How Different Industries Win
How do businesses actually use these tools? They use them to make life easier for their customers and to Generate Leads faster.
A hospital adds video calls to its patient portal. The doctor and patient connect with one click. They do not download extra software. They talk securely on the hospital’s website, protecting sensitive health data easily.
A retail store adds live video to its product pages. A shopper clicks a button and talks to a store expert right away. The expert shows the actual product on camera in crisp 4K resolution. The shopper buys it immediately.
A school adds video to its digital library. The teacher hosts a class right inside the school’s platform, using digital workspace tools like inLynk to manage the student experience and share documents. The students click a link and join the lesson easily. Discover more examples in our breakdown of industry video solutions.
A video API is a set of pre-written code blocks. It lets you add live video calls directly into your own website or mobile app without building the complex technology from scratch.
How do I add this to my website?
Your developer takes a small piece of code from the provider and pastes it into your website’s backend. You customize the colors, and the video feature goes live in a few days.
Why does this save money?
You avoid paying a team of engineers to build the core technology for six to nine months. You also avoid paying massive server costs to host the heavy video data yourself.
What is the difference between an API and an app like Zoom?
An app like Zoom forces users to leave your website, download a program, and use their platform. An API hides the technology inside your own website so it looks like you built it yourself.
Why do custom video builds fail?
They fail because video technology changes constantly. Web browsers update, phone systems change, and connections drop. Most companies cannot afford to spend 40% of their IT budget just fixing broken video code.
A virtual healthcare platform lowers hospital costs, cuts patient wait times, and improves access to care. It connects scheduling, patient records, and secure billing into one smooth online clinic platform, going far beyond basic video calls.
Hospitals today face tight budgets, long wait lines, and exhausted medical staff. Moving to a digital care model helps solve these exact problems. However, hospital leaders often wonder if the investment in new software will actually pay off.
This guide breaks down the real return on investment (ROI), the daily benefits for doctors and patients, and the actual use cases that make this technology essential for modern hospitals.
When you look at the financial side, the value of a digital clinic becomes clear very quickly. According to recent medical studies on no-show rates, hospitals that use a full digital system see a massive drop in missed appointments. This directly protects hospital revenue.
Here is a close look at how a dedicated system brings real financial return to your hospital:
Fewer Missed Visits: Patients often miss appointments due to traffic, bad weather, or lack of transport.Virtual visits remove these physical barriers.Automated text and email reminders keep patients on track and ensure the doctor’s schedule stays full.
Lower Facility Costs: When more patients see doctors online, the hospital uses fewer physical resources. You save money on waiting room space, physical exam rooms, paper products, and basic medical supplies like gloves and gowns.
Wider Patient Reach: A physical building limits your hospital to local patients. An online clinic platform allows your doctors to treat patients who live hours away or in rural areas that lack good medical care. This brings new patients into your health system.
Better Staff Time: Doctors spend less time walking between rooms and waiting for patients to arrive. A smart platform moves the doctor from one virtual room to the next instantly.
Faster Billing Cycles: Good platforms log the exact start and end time of every visit. The billing team uses this exact data to send clean, accurate bills to insurance companies. This speeds up payments and stops denied claims.
Need help fixing hospital workflows and stopping missed appointments? See how our smart booking system speeds up intake. Book a personalized demo of our platform.
Virtual Healthcare Platform vs. Basic Telemedicine
Many clinics make the mistake of using consumer video apps for medical care. These basic apps are fine for chatting with friends, but they fail in a real medical setting. They do not connect to hospital records and lack proper security.
A true virtual platform is a complete medical workspace. It is professional video collaboration software built specifically for healthcare. Here is how a real platform compares to basic apps:
Feature
Basic Telemedicine App
Dedicated Virtual Healthcare Platform
Patient Records
Manual entry only
Connects directly to hospital data
Waiting Rooms
None
Secure virtual waiting areas with patient queue
Billing Tracking
Hard to track visit length
Logs exact time for accurate, clean bills
Security Standard
Basic consumer privacy
Full medical-grade security
Doctor Workflow
Separate screen for notes
Notes and video on the same screen
Solving the Doctor Burnout Problem
Doctors are tired. They spend hours every day clicking through confusing software and typing notes after their shifts end. A good digital system must make the doctor’s job easier, not harder.
Everything in One Place: Doctors do not want to switch between a video screen and a patient record screen. A proper platform puts the video feed, the patient history, and the medical notes in one single view.
Smart Scheduling: You cannot treat doctors like on-demand drivers. A good system handles complex schedules, blocks out time for breaks, and respects the doctor’s real working hours.
Automated Intake: Before the doctor even joins the call, the software asks the patient basic questions about their symptoms. The doctor reads this summary instantly and starts providing care right away without wasting the first ten minutes on basic questions.
The Patient Experience: Keeping It Simple
If the software is hard to use, patients will not use it. Older patients or those who are not good with technology often struggle to download heavy applications or remember complex passwords.
The best platforms focus on simple access. They provide Web & App Access, meaning patients can choose exactly how they join. They can download a dedicated app if they want, or they can simply click a safe web link sent to their phone or email. This removes the tech barriers. The patient clicks the link, enters a secure virtual waiting room, and waits for the doctor.
Hospitals use these systems for much more than just treating common colds or sinus infections. Real use cases span across many different medical departments.
Post-Surgery Follow-ups: After a major surgery, traveling back to the hospital is painful and dangerous for the patient. Doctors use video calls to check healing progress, look at surgical wounds, and adjust pain medication without making the patient leave their bed.
Mental Health Therapy: Therapists and psychiatrists need a safe, private space for ongoing care. Virtual platforms give patients the comfort of talking from their own homes. This leads to more consistent therapy sessions and better mental health outcomes.
Chronic Care Tracking: Patients with heart disease or diabetes need constant monitoring. Doctors use virtual platforms to check blood pressure and blood sugar data from remote devices between visits. This helps spot warning signs early before the patient needs emergency care.
Urgent Care Triage: When a patient feels sick, they often go straight to the emergency room, even if they do not need to. A virtual triage system lets a nurse speak to the patient online first. The nurse can tell the patient to stay home and rest, go to a local clinic, or head to the emergency room. This keeps the emergency room clear for true emergencies.
Specialist Consultations: Small rural hospitals do not always have experts like neurologists on staff. With a digital platform, a rural doctor can bring a city specialist onto the video call to help diagnose a complex patient case instantly.
Security and Compliance: Keeping Patient Data Safe
Protecting patient facts is the absolute most important part of digital care. Public video apps put hospitals at massive risk of data leaks and heavy fines.
According to federal guidelines for secure telehealth, strict access controls stop unauthorized users from joining medical calls. A proper system encrypts all video, audio, and text data. This means that even if a hacker tries to listen, the data looks like scrambled code.
Secure Waiting Rooms: Patients wait in private digital rooms. They cannot see or hear other patients.
Data Control: The hospital owns all the data. The video software company cannot look at the patient records or sell the data.
Audit Trails: The software tracks exactly who logs in, what files they look at, and how long they stay. This helps hospital IT teams spot any strange activity instantly.
Managing Virtual Workflows and Teams
Running a hospital means managing hundreds of moving parts. A digital clinic is no different. Hospital administrators need tools to run the online clinic smoothly behind the scenes.
Move Patients Quickly: In a busy virtual clinic, nurses need to move patients from a general waiting room into a specific doctor’s private room. Good software allows staff to manage participants easily, moving them around just like in a physical building.
Multi-Doctor Calls: Sometimes a patient needs to speak to their primary doctor and a heart specialist at the same time. The platform must allow multiple doctors to join the same secure call without dropping the connection.
Screen Sharing for Test Results: Doctors need to show patients their X-rays or blood test results. Safe screen sharing lets the doctor point out specific details on the scan so the patient understands their own health better.
Connecting to Existing Hospital Systems
A new software tool is useless if it does not talk to the tools your hospital already uses. The best virtual platforms connect directly to your hospital’s main Electronic Health Record (EHR) system.
When the systems connect, magic happens. The doctor schedules the video visit in the main hospital system. The virtual platform automatically creates the secure video link and sends it to the patient. When the visit ends, the exact length of the call and the doctor’s notes save directly back into the main patient file. There is no double-typing, no lost data, and no confusion.
This deep connection also helps the pharmacy. If the doctor prescribes medicine during the virtual call, the system sends the order straight to the patient’s local pharmacy automatically. The patient just drives over and picks it up. This smooth process builds trust and keeps patients happy.
Making the Final Decision
Choosing to adopt a comprehensive digital system is a big step for any hospital. It requires training staff, changing old habits, and investing money upfront. However, the long-term benefits clearly outweigh the initial effort.
By reducing missed visits, saving physical resources, speeding up billing, and keeping doctors happy, a strong platform pays for itself. Most importantly, it gives patients the fast, easy, and safe medical care they expect today.
Frequently Asked Questions
FAQWhat is a virtual healthcare platform?
It is a complete digital system that allows hospitals to manage online patient visits, share medical notes, and handle billing safely in one single place. It replaces basic video apps with a secure, medical-grade workspace.
How does a hospital measure the ROI of online care?
Hospitals track the drop in missed appointments, the time saved by doctors between visits, and the reduction in physical clinic costs. They also look at new revenue gained by reaching patients in distant areas.
Why do basic video apps fail in hospital settings?
Basic consumer apps lack the strict security required by privacy laws. They also fail to connect to medical records, forcing doctors to type notes twice and wasting valuable time.
How do older patients handle the technology?
The best platforms use simple web links. Patients do not need to create accounts or download large applications. They simply click a secure link sent via text message to join the doctor instantly.
Is online patient data actually safe from hackers?
Yes, if you use a certified platform. Real medical platforms use deep encryption for all video and text. They also use secure waiting rooms and strict login rules to ensure only the right doctor and patient can join the call.
Buying classroom management software means choosing a digital tool that tracks student attendance, shares class materials, and runs tests. A good virtual learning system saves time, keeps students engaged, and fits your school budget from the start. To see a platform built for these exact needs, explore our classroom management software.
Why Universities Desperately Need Better EdTech Tools Right Now
The world of education changes fast. Industry standards show that universities using an updated virtual classroom platform cut daily admin work by 30% this year. Schools no longer rely just on physical books and paper tests. Students expect to log in from anywhere, find their homework, watch a live lecture, and check their grades in one spot.
When your school relies on old tools, teachers spend too much time fixing broken links or finding lost files. A modern system puts everything in one clear space. It helps teachers focus on teaching. It helps students focus on learning.
How to Eliminate Tech Glitches Frustrating 40% of Your Students
Many universities face the same daily headaches. Old software runs slow. Students complain they cannot load their video lectures. Teachers spend hours clicking through bad menus just to post a single grade.
These small delays add up. Research indicates that bad tech tools cause 40% of student frustration in online classes. Schools lose money and time when they force staff to use broken platforms. You need an online classrooms platform that works right the first time.
Stop Paying for Fluff: The 5 Software Features Your Campus Needs
When you buy a new system, you must look for specific features. Do not pay for extra tools you will never use. Focus on the core things that make daily classes run well.
Clear Video Calls: The system must run live video without freezing. It should let teachers share their screens and let students talk back.
Fast Grading Tools: Teachers need a simple way to read papers, add comments, and post grades fast.
Mobile Phone Access: Students do most of their work on their phones. The software must have a good mobile app.
Easy Chat Boards: Students need a place to ask questions and talk with other students outside of class hours.
Simple File Sharing: Teachers must be able to upload big files, reading lists, and test forms with one click.
Beyond File Sharing: How the Right Platform Drives Student Success
A great platform does more than store files. It actively helps students learn better. When materials stay organized, students miss fewer deadlines. When video tools work well, remote students feel like they sit right in the classroom.
Clear communication tools build a strong class community. Students can quickly message a teacher if they struggle with a topic. They can form study groups using built-in chat rooms. Good classroom management software bridges the gap between the screen and the student, making education feel personal again.
Exposing Hidden Fees: How to Accurately Budget for New Software
Money plays a big role in buying new software. You must look past the sticker price. Many companies charge a base fee, but they add extra costs later.
You need to know how many students will use the system. Some tools charge per student. Others charge a flat yearly rate. You also need to ask about setup fees. Some companies charge thousands of dollars just to turn the system on.
Always ask about support costs. Do you have to pay extra to call a help desk? Make sure you know the full price before you sign anything.
Basic vs. Advanced Virtual Learning: Which Fits Your Campus Best?
You have to decide between a simple setup and a larger, advanced tool. Your choice depends on your school size and your budget.
Feature
Basic Platforms
Advanced Virtual Learning Tools
Yearly Cost
Low or free
Higher yearly fee
Help and Support
Email only
24/7 phone help
Class Size
Up to 50 students
Unlimited students
Custom Colors/Logos
No
Yes
Mobile App
Basic reading only
Full video and testing
Bulletproof Your Campus: Protecting Student Privacy from Attacks
Student privacy matters more than anything else. Schools hold very personal data. This includes grades, home addresses, and health records. The law says you must keep this data safe.
When you look at new software, you must ask the company how they lock the data. Research indicates that cyber attacks on schools happen every week. Your software must have strong passwords and backup plans. If the system crashes, you cannot lose a whole year of grades.
5-Step Framework for Buying Educational Software
Buying a huge software package feels hard. You can make it easy if you follow clear steps. Do not rush the process. Take your time to get it right.
Build a Team: Do not let one person make the choice. Form a group. Include teachers, tech staff, and even a few students. Ask them what they hate about the current system.
Make a Needs List: Write down the features you must have. Write down the features you want but do not need. Keep this list short and clear.
Test the Software: Never buy a system without testing it first. Ask the company for a free trial. Have your tech team try to break it. Have your worst tech-skilled teacher try to use it.
Check Other Systems: Make sure the new software talks to your old systems. If your school uses an old email tool, the new class software needs to connect to it.
Review the Contract: Read the rules. Know how long you must pay for the tool. Find out how you can leave if the tool stops working well.
How to Secure 100% Teacher Buy-In Without Using Boring Manuals
Buying the best virtual classroom platform means nothing if teachers do not know how to use it. Poor training ruins good software.
You must plan training days before the school year starts. Do not just hand teachers a big manual. Give them short, clear steps. Show them how to set up one class. Show them how to grade one paper.
Research indicates that schools with strong, hands-on training see 50% faster software adoption. Give your teachers time to make mistakes in a fake class before real students log in. Offer drop-in help sessions every week for the first month.
Why 24/7 Vendor Support is Your Ultimate Lifeline During Crises
The real test of a software company starts after you sign the contract. Tech problems will happen. A server might go down during finals week. A teacher might lock themselves out of their account.
You need a company that answers the phone fast. Check their support hours. If your students take night classes, a help desk that closes at five does not help you. Great support turns a massive panic into a quick fix. Ask the vendor to prove their response times before you buy.
The Headache-Free Guide to Migrating Thousands of Student Records
Moving from an old system to a new one scares many schools. You have thousands of old grades, files, and student lists. You cannot lose them.
Plan your data move carefully. Do it during the summer or a long break. Clean up your old files first. Delete classes from ten years ago that you no longer need. Then, work with the new software company to move the clean data.
Test the data after the move. Pick ten random students and check if their old grades look right in the new system. Fix the errors before the teachers start setting up their new pages.
After you buy and set up the online classrooms platform, ask the students what they think. They use the tool every day. They know if the mobile app crashes. They know if the video links fail.
Send out a short survey after the first month. Ask simple questions. Ask them to rate the speed. Ask them if they can find their homework easily. Use their answers to fix small problems early. If students like the tool, they will do better in their classes.
Frequently Asked Questions
FAQWhat is classroom management software?
It is a digital tool that helps schools run classes, track grades, and share files in one clear place. It replaces paper records and messy email chains.
How to choose the best virtual classroom platform?
Look at your school size, your budget, and what your teachers need most. Always ask for a free trial and test the software before you sign a contract.
Why does my school need an online classrooms platform?
It saves teachers time, keeps students learning from anywhere, and makes grading much easier. It keeps all class details in one safe spot.
How much does virtual learning software cost?
Costs vary widely. Some simple tools cost nothing but offer no support. Big systems cost thousands of dollars a year. Always check for hidden setup fees or extra charges for help desk calls.
How do we move data to new software?
Clean out old, useless files first. Work with the new company to transfer the remaining clean data. Always test a few files to make sure the move worked right before you delete the old system.
New video conferencing platform utilizes a disruptive concurrent licensing model to slash software costs. By allowing enterprises to pay only for simultaneous meeting hosts rather than every individual user, organizations can reduce annual recurring expenses by up to 70%.
According to industry standards, most traditional video conferencing software relies on a rigid per-user (or per-seat) pricing model. In this structure, organizations pay a recurring monthly fee for every employee on their payroll who is granted an account, regardless of their actual meeting frequency.
Research indicates that this structure leads to severely inflated IT budgets. Data suggests that 98% of global video meetings have fewer than 10 participants, highlighting the vast inefficiency of licensing an entire enterprise for constant, large-scale meeting capacity. For large enterprises, it is common for only a small percentage of the workforce to actually host video calls at any exact moment. Consequently, companies end up paying for thousands of inactive or empty seats. For a Chief Financial Officer (CFO) or IT Director focused on optimizing Total Cost of Ownership (TCO), this represents a significant and unnecessary financial drain.
The definitive solution to this bloated Total Cost of Ownership is the implementation of a concurrent licensing model. This innovative approach fundamentally changes how organizations procure communication tools.
Instead of licensing every potential user, an organization purchases a shared pool of licenses based strictly on their peak simultaneous usage. For example, if a corporation has 1,000 employees but determines that no more than 100 users will ever host a meeting at the exact same time, they only need to purchase 100 concurrent licenses. This dynamic allocation allows the entire workforce to remain connected while driving unparalleled cost efficiency. Adopting this structural shift decouples headcount growth from software expenditure, providing a more scalable and predictable cost structure.
Beyond cost optimization, a high-performing video collaboration platform must eliminate technical friction. Built entirely on an open-source WebRTC (Web Real-Time Communication) framework, modern platforms allow users to host and join meetings directly through their web browsers.
This client-less architecture means there are no software downloads or plugin installations required to connect. This ensures that high-definition, 4K-ready video communication is instantly accessible to both internal staff and external clients, who may not have the organization’s standard software installed. According to global technology research firm Gartner, achieving frictionless, boundary-less collaboration is currently a top priority for enterprise IT leaders seeking to improve digital dexterity.
Furthermore, removing barriers to entry does not mean compromising on safety. Enterprise-grade security protocols ensure that these browser-based meetings remain strictly confidential. Top platforms provide multi-layered security, including AES 256-bit encryption and true End-to-End Encryption (E2EE), which is considered the gold standard for protecting communication security.
Financial efficiency must not come at the expense of technological advancement. To remain competitive, a video conferencing platform must integrate intelligent tools designed to boost workforce efficiency.
Artificial intelligence is now a baseline requirement for collaboration. Advanced platforms automatically capture key discussion points, extract action items, and generate full transcriptions in both original and auto-corrected formats. By automatically processing conversations, these tools eliminate the need for manual note-taking and ensure strict alignment on post-meeting tasks. As noted by industry leaders in the Harvard Business Review, integrating AI meeting assistants drastically reduces the administrative burden on managers, freeing them to focus on high-value strategic work.
For C-Suite executives overseeing complex global operations, software scalability is essential. An enterprise-grade platform can dynamically scale its backend infrastructure to handle massive fluctuations in demand.
Top-tier solutions are engineered to support highly interactive sessions with up to 100,000 participants without compromising video or audio performance. Utilizing scalable backend infrastructure and an auto-scalable MCU (Multipoint Control Unit), these inbuilt webinar modules ensure that global town halls, expansive training sessions, and massive virtual events execute flawlessly.
In a saturated Unified Communications market, the most significant innovation is no longer just another software feature—it is a fundamental shift in the business model. For the C-Suite, the transition to a concurrent licensing model represents a strategic opportunity to drastically optimize the Total Cost of Ownership (TCO) without sacrificing enterprise-grade capabilities like 4K video, AI summarization, or massive scalability.
By shifting the competitive battleground from the IT department’s feature checklist to the CFO’s budget spreadsheet, organizations can stop paying for empty seats and start paying only for the value they use. It is a definitive step toward leaner, smarter, and more frictionless enterprise collaboration.
Frequently Asked Questions
FAQWhat is a concurrent licensing model in a video conferencing platform?
A concurrent licensing model allows an organization to purchase a set number of licenses based on the maximum number of simultaneous meeting hosts they anticipate having at any given time. Instead of paying for an account for every single employee, the entire organization shares a specific pool of active licenses, drastically lowering software costs.
How do we transition our team to new video conferencing software seamlessly?
Transitioning smoothly requires choosing a platform built on WebRTC technology. Because WebRTC operates directly within standard web browsers, there are no software clients to download or install. This allows IT departments to deploy the software organization-wide instantly, minimizing user friction and eliminating complex change management procedures.
Why is WebRTC critical for a modern video collaboration platform?
WebRTC provides a frictionless user experience. It allows external clients, partners, or candidates to join high-definition meetings by simply clicking a link, bypassing the need to create accounts or download proprietary applications. This significantly improves attendance rates, reduces technical troubleshooting, and provides highly professional optics for external communications.
What is the expected ROI when switching to concurrent licensing?
By eliminating the financial waste associated with unused “per-user” seats, large enterprises and cost-conscious organizations can expect to reduce their annual recurring conferencing expenses by up to 70%. This substantial saved capital can then be reinvested into other critical areas of business development or IT infrastructure.
Imagine for a moment that you are working in a physical office. You are sitting at your desk, and you need to ask a colleague a quick question. In the physical world, you would simply turn your chair around and speak. It is seamless. It is instant. You do not have to leave the building, walk down the street, enter a different building, and sign in at a front desk just to say hello.
Now, think about how we work online today. You are typing in a chat application. You decide you need to talk face-to-face. Often, this means you have to leave that application, open a completely different piece of software like Zoom or Teams, schedule a meeting, copy a link, go back to the chat, paste the link, and wait for the other person to click it. It feels like leaving your office building just to have a conversation.
This is where the concept of integrating video conferencing into your digital ecosystem comes in. When we talk about a “digital ecosystem,” we are simply referring to the collection of different computer programs and apps your company uses every day. This includes your email, your calendar, your chat tools, and the software you use to manage customer information. Integrating video conferencing means connecting your video tools to these other apps so they talk to each other. It effectively knocks down the walls between your digital rooms, allowing you to move from typing to talking as easily as turning your chair around in a physical office.
Why Integrate Video Conferencing Within Your Company’s Digital Ecosystem
You might be wondering why this effort is necessary. After all, opening a separate video app only takes a few seconds. While those seconds seem small on their own, they add up to a massive amount of lost time and focus when you multiply them across every employee and every day of the year.
The primary reason to integrate is to eliminate what experts call context switching. Context switching happens when your brain has to stop one task and shift gears to manage a different tool. Every time you have to minimize a window to open a video app, your brain loses its train of thought. By integrating video directly into the tools you are already using, you preserve your focus. You stay in the flow of your work.
Another major reason is data accuracy. When your video tools are separate, information gets lost. If you have a video meeting with a client, you often have to manually type notes into your customer database afterwards. If you forget, that information is gone forever. When you integrate these systems, the computer can do this work for you. It can automatically log that a meeting happened, record how long it lasted, and even save the recording directly into the client’s file without you lifting a finger.
3 Implementation Paths to Video Conferencing Integration
There is no single way to achieve this. Depending on your budget, your technical skills, and your goals, you can choose from three distinct paths. We will look at these paths ranging from the easiest method to the most highly customized method.
Path 1: The “Connector” Strategy (Low Effort, High Speed)
The first path is what we call the Connector Strategy. This is the best place to start because it usually requires no technical skills whatsoever. This strategy relies on pre-built connections that software companies have already created for you.
In the software world, many of the tools you use every day already have these “plugs” ready to go. A common example is the integration between team chat apps like Slack and video tools. You can install a small add-on that lets you type a simple command in a chat channel to instantly start a video call. The video window pops up right there, or gives a one-click link for everyone in that channel.
This path is low effort because the hard work has already been done by the software vendors. It is high speed because you can usually set it up in minutes. You simply go to the settings menu of your favorite app, look for a section called “Integrations” or “Apps,” and search for your video conferencing provider. Once you click “Connect” and sign in, the two systems begin working together.
Path 2: The “Automation” Strategy (No-Code/Low-Code)
The second path is the Automation Strategy. For this path, you use “No-Code” or “Low-Code” automation tools. These are special platforms that act like a digital middleman or a universal translator. The most famous examples are tools like Zapier or Make. You do not need to know how to write computer code to use them, but you do need to think a little bit logically.
In this strategy, you set up “triggers” and “actions.” A trigger is the event that starts the process. An action is what happens next.
For example, you could tell the automation tool that the “trigger” is a new appointment being booked on your calendar. You then set the “action” to create a Zoom meeting link. You can then add a second “action” to email that link to the customer. You can even add a third “action” to send a message to your team’s chat channel saying a new meeting has been booked.
This strategy is powerful because it removes human error. You no longer have to remember to copy and paste links or send reminder emails. The robot does it for you every single time. It is called “No-Code” because you are usually building these workflows by dragging and dropping blocks on a screen rather than typing programming language. It requires a bit more effort than Path 1 because you have to design the workflow, but it gives you superpowers in how your team manages their time.
Path 3: The “Embedded” Strategy (High Effort, High Customization)
The third path is the Embedded Strategy. This is the most advanced method, but it is also the most rewarding. This is where you stop using other people’s apps and instead build video capabilities directly into your own website or mobile application.
In this path, you are making video a native part of your own software. That’s why this path requires high effort because you need software developers to write the code and maintain it.
To achieve this, your developers use a technology called an API (Application Programming Interface). In the software world, you might have heard this acronym before. It stands for Application Programming Interface.
An API is essentially a set of code instructions provided by a video company (like inAPI) that your developers can copy and paste into your own software. These instructions allow your website to borrow the powerful video technology from the provider while keeping your own look and feel.
This strategy gives you total control. When you use a standard app like Zoom or Teams, you have to accept their layout, their colors, and their logos. With the Embedded Strategy, you design the screen exactly how you want it.
This is the standard approach used by modern telehealth apps. When a patient needs to see a doctor, they do not want to download a generic app and figure out how to use it. They log into the hospital’s secure portal, click on the “Start Consultation,” button, and the doctor appears on the screen. The patient never has to download a new app or create a separate login. The video is simply a feature of the website they are already using.
Which is the Right Implementation Path for You?
With three different paths available, it can be overwhelming to decide which one to choose. The good news is that you do not have to choose just one forever. You can evolve through them as your needs change. Here is a simple way to help you decide where to start.
Start with Path 1
You should almost always start with Path 1. It is the “low hanging fruit.” Look at the tools your team uses every single day. Check your email provider, whether it is Microsoft Outlook or Google Gmail. Check your Customer Relationship Management (CRM) system if you have one. Check your team chat app.
Go into the settings of these applications and see if they have a “one-click” integration for video. If they do, turn them on immediately. There is very little downside to this. It costs nothing in terms of development time, and it immediately solves the problem of having to open multiple tabs just to start a meeting. If your team is small and you just need to talk to each other efficiently, Path 1 might be all you ever need.
Move to Path 2
You should move to Path 2 if you start noticing repetitive manual work. Pay attention to how your team spends their day. Are they manually copying and pasting the same email invitation text five times a day? Are they manually downloading a video recording from the cloud and then uploading it to a folder in their project management software Identifying these repetitive tasks can help you decide when it’s time to automate workflows and improve overall efficiency.
These are signs that the basic connectors from Path 1 are not enough. If you find your team acting like robots—doing the same simple task over and over again—it is time to look at a tool like Zapier or Make. This is also the right path if you need to connect two tools that are not very popular and therefore do not have a pre-built integration.
Reserve Path 3
You should reserve Path 3 for a very specific scenario. This path is usually not for internal team meetings. It is for when you are interacting with your customers.
If you are building a product or a service where the customer experience is everything, sending them to a generic “Zoom link” can feel unprofessional. It breaks the immersion. Imagine you are a luxury jewelry brand. You have a beautiful website. If a customer wants to see a diamond, and you send them a generic link that asks them to download software, the magic is broken.
In this case, you want the video to happen right there on your website. You want the colors to match your brand. You want the experience to be seamless. This is when you hire developers to use an API and embed the video. It costs more money and time to build, but it adds massive value to your brand.
Vendor Landscape and Selection Guide
Now that you understand the paths, you need to know who provides the technology. The world of video software is vast, but for the purpose of integration, we can divide the vendors into three main categories.
7.1 SaaS Platforms
The first group is the most familiar SaaS providers. SaaS stands for Software as a Service. These are the companies that sell ready-made video applications that you subscribe to, usually on a monthly basis.
The most famous names here are inMeet, Zoom, Microsoft Teams, and Google Meet. These platforms are excellent at what they do. They are reliable, millions of people know how to use them, and they are packed with features. If you want a standard meeting experience, they are perfect. If you want to build something unique, they can be limiting.
7.2 Programmable Video Providers (CPaaS)
The second group is less famous to the general public but incredibly powerful for businesses. We call them Programmable Video Providers or CPaaS. This stands for Communications Platform as a Service.
These providers are the engine behind the Embedded Strategy we discussed in Path 3. Instead of selling you a finished video application that you just log into, they sell the raw technology that powers video calling. They provide the code and the server infrastructure that your developers use to build video directly into your own website or mobile app.
Providers like inAPI are particularly notable in this space because they focus on making these building blocks secure and easy to use. inAPI is often the invisible force behind the platform you see.
If you have ever used eSanjeevani to consult a doctor online, you didn’t download a “Zoom” or “Teams” app. You simply logged into the government portal, clicked a button, and the doctor appeared on your screen. That seamless experience was powered by the same technology that drives inAPI.
7.3 Integration Middleware (iPaaS)
The final group of vendors does not provide the video itself, but they provide the glue that holds everything together. We call them Integration Middleware or iPaaS. This stands for Integration Platform as a Service.
These are the companies we mentioned in Path 2, such as Zapier, MuleSoft, or Make. They do not host your video calls. Instead, they sit in the middle between your video provider (like Zoom) and your other tools (like your email).
These vendors are essential if you are taking the Automation Strategy. When selecting a vendor in this category, you want to look at how many “connectors” they have. A tool like Zapier connects to thousands of different apps. This increases the chances that they can talk to the specific software your company uses. You also want to look at how easy they are to use. Some are designed for complete beginners with visual drag-and-drop interfaces, while others are more complex and meant for IT professionals.
Making Digital Communication Feel Natural
Integrating video conferencing into your digital ecosystem is not just a technical task. it is a way to respect your employees’ and customers’ time. Whether you start by simply flipping a switch in your calendar app or embark on a journey to build a fully custom video platform for your website, the goal remains the same. You are trying to make communication as natural and immediate as turning your chair around to talk to a colleague. By understanding these paths and the vendors available, you can build a digital workplace that flows smoothly, allowing your team to focus on their work rather than on the tools they use to do it.
Ready to Take the Next Step?
If your team is exploring embedded or API-based video integration, inAPI provides developer-friendly tools to get started quickly.
FAQs
FAQWhat is video conferencing integration in a digital ecosystem?
It connects your video tools with other apps like email and chat so they work together seamlessly. This lets you start calls instantly without switching between different programs or copying links manually.
Why should companies integrate video conferencing into their digital ecosystem?
Integration saves time by stopping employees from constantly switching contexts to open separate video apps. It also improves data accuracy by automatically logging meeting details and recordings directly into your business systems.
Which business systems can be integrated with video conferencing platforms?
You can connect almost any tool your team uses daily, including email clients, calendars, and team chat applications. It is also very common to integrate video into Customer Relationship Management (CRM) systems and healthcare portals.
How do APIs enable video conferencing integration?
APIs act like a digital messenger that allows your custom software to “borrow” a video provider’s technology. They let developers build video features directly into your own website or app without needing to build the technology from scratch.
What are the steps to integrate video conferencing within a company’s digital ecosystem?
Start by checking if your current apps have pre-built “one-click” video connectors and turn them on. If you need more customization, use automation tools to connect apps or hire developers to embed video using an API.
Is video conferencing integration secure for enterprises?
Yes, reputable providers use strong encryption to ensure your conversations cannot be spied on by outsiders. When using an API or connector from a trusted vendor, your data remains protected and compliant with safety standards.
A Video Conferencing API, often referred to as a video call api, is a ready-made software component that allows developers to add real-time video calling, meetings, and communication features to any app or website without building the technology from scratch.
Think of it as installing a powerful engine into your application instead of building one from the ground up. The API handles all the technical complexity—connecting users, transmitting video and audio, synchronizing streams, and maintaining call quality—so your team can focus on design, user experience, and innovation.
Whether you are building a telehealth app, an online education platform, a customer support tool, or enterprise collaboration software, a Video Conferencing API provides everything required to power smooth, secure, and scalable video communication.
When you use an app to make a video call, the connection feels instant. However, a lot of complex work happens in that split second. You do not see it, but the Video Conferencing API is managing the entire journey of the call from start to finish. Here’s a glimpse of what such API does behind the scenes:
It establishes the connection: Before any video can appear, the two devices must find each other. The API acts as a messenger to locate the person for the WebRTC video call and creates a secure, digital tunnel between your device and theirs using a webrtc based video api.
It compresses the video data: Raw video takes up a lot of digital space. A high-quality video file is too heavy to send over the internet in real-time. If you tried to send it without changes, the call would freeze immediately. The API takes the images from your camera and shrinks the data size instantly. It packages this information into small, manageable bundles that are light enough to travel fast.
It transmits the information: Once the data is packaged, the API sends it through the internet. It makes sure video bundles and the audio bundles arrive at the exact same time. This is critical because if the audio arrives even a millisecond later than the video, the sound will not match the movement of the person’s lips. So it keeps everything perfectly synchronized.
It adapts to internet speed: Internet connections are rarely stable. So the API monitors this connection every second and adjusts it accordingly. If your internet speed drops, it automatically lowers the video quality just enough to keep the audio clear. It prioritizes low latency video to keep the conversation going smoothly over having a perfect picture.
7 Core Features of Video Conferencing API
When you use a virtual meeting api or a group video call api, you are getting a complete set of tools to make the meeting useful and interactive. Here are the essential features included in most standard packages:
High-Definition Audio and Video capabilities: This module automatically handles the complex work of capturing and delivering crystal-clear sound and visuals. It manages the data compression so that developers do not have to write code for processing millions of pixels.
Screen Sharing capabilities: This feature provides a ready-made tool that captures exactly what is on a user’s computer screen and broadcasts it to others. Developers can simply switch this function on to let users present documents or slides. This eliminates the need to build a complex screen capture engine yourself.
Cloud Recording capabilities: The API includes a recording system that captures the video stream and saves it directly to a secure online server. This allows developers to offer playback functionality to users immediately after a meeting ends. It removes the burden of managing massive storage hard drives for your own company.
Real-Time Chat capabilities: This bundle adds a text messaging layer that runs perfectly alongside the video stream. It provides the infrastructure to send instant messages, emojis, or links without interrupting the conversation. This ensures that the real-time communication api functions seamlessly on two channels at once.
Participant Management capabilities: This set of controls gives the host the power to manage the people in the room. It provides the pre-written logic needed to mute noisy microphones or remove unwanted guests. Developers can use these commands to easily build an admin panel for meeting hosts.
Cross-Platform Support capabilities: Whether you use a mobile video sdk or a browser video api, this capability ensures that the video code works on every device, from phones to web browsers. The API library contains the specific instructions for each operating system. This allows the developer to write the code just once and have it run everywhere.
Virtual Backgrounds capabilities: This advanced module uses artificial intelligence to distinguish the user from their surroundings. It allows developers to add features like background blurring or image replacement with a single command. This helps users maintain privacy without the developer needing to become an expert in computer vision.
Why Business Use Video Conferencing API?
Here are the main reasons people choose an api for video conferencing instead of building it themselves.
1) It Saves Development Time
If a company decides to build its own video engine, it can take a year or more to complete. This is because they have to write millions of lines of complex code. By using webrtc integration, developers can skip this entire building phase.They can simply plug the finished technology into their app. This allows them to launch their product in weeks instead of years. Today, even Chatgpt users are leveraging such APIs to quickly build and test real-time communication features without starting from scratch.
2) It Reduces Upfront Costs
Building video infrastructure requires expensive physical servers. You have to buy powerful computers to process the video data. You also have to pay to keep them running twenty-four hours a day, even if no one is making a call. With an API, you do not buy any servers. You usually pay a small fee only for the minutes of video you actually use.
3) It Solves Complex Technical Problems
Video data is very heavy and difficult to move. It often gets stuck when internet connections are weak or when firewalls block it. An API provider has already solved these difficult problems. They have built a global network of servers that ensures the live video api flows smoothly. A regular company would struggle to build a network this reliable on its own.
4) It Handles Maintenance and Updates
Technology changes very fast. New phones come out every year, and web browsers update constantly. Every time this happens, the video code might break. If you build it yourself, your team has to constantly fix these breaks. When you use an API, the provider fixes them for you. You get the updates automatically without doing any extra work.
5) It Scales Instantly
When an app becomes popular, thousands of people might try to use it at the same time. If you built the system yourself, your servers might crash under the pressure. An API handles this pressure for you. It can support two people or two million people instantly without you needing to change anything.
Should I be Using Video Conferencing API in my Business?
Absolutely! You should use an embed video api to add one of the best video calling solutions to your software immediately. This allows you to add professional video features while keeping your team focused on your actual product.
Building video technology from scratch is incredibly complex and expensive, often distracting developers from their primary goals for months or even years. By using an API, you offload all the difficult technical responsibilities like security and connection stability to experts who manage it for you.
This approach helps you create a custom video conferencing app where you can design a custom video call layout that perfectly matches your brand identity. Ultimately, it provides the fastest path to launching a reliable and high-quality application without the heavy financial risk of developing the infrastructure yourself.
How to Get Started With Video Conferencing API Today?
Integrating a video system might sound like a massive engineering project, but the process is actually quite standardized. Here is the practical path to getting started.
1) Select your Video Conferencing API provider
The first step is to choose the company that will power your video infrastructure. You have many options ranging from large global companies to specialized video meeting software api platforms. You should look for a provider that offers good documentation and a pricing model that fits your budget.
2) Get your API credentials:
Once you choose a provider, you will sign up for a developer account on their website. After you register, the system will generate a set of unique digital keys for you. These keys act like a secure password that allows your specific application to talk to their cloud servers.
3) Install the software development kit:
You do not need to write the complex code for video transmission yourself. Instead, you will download a pre-made package of code called an SDK from your provider. This package contains all the difficult engineering work already finished and ready for you to use. You simply install this package into your application’s code base.
4) Initialize the video engine
With the kit installed, your developer will write a few lines of code to start the video engine. This step usually involves telling the app to use your unique API keys to authenticate itself. It establishes the connection between your user’s device and the provider’s network.
5) Create a digital room
The core concept of a video meeting api is the room. You will write a simple command that tells the API to create a unique digital space. This is the virtual meeting place where your users will connect with each other.
6) Run your first test
The final step is to run the application and test the connection. You can open your app on two different devices and have them join the room you just created. If you see video and hear audio on both ends, your video conference integration is successful.
How Difficult is to Integrate a Video API in Software?
Integrating a Video Conferencing API is designed to be a manageable task for any competent developer.
The process does not require them to be an expert in video engineering. Providers like inAPI supply a complete set of tools known as a Software Development Kit. This kit contains the complex code needed to handle video streams so the developer does not have to write it.
The developer simply installs this package into their existing application. They then use secure access keys to link their software to the provider’s cloud system. Because the difficult backend infrastructure is already working, a basic integration can often be completed in a few hours. This also highlights how modern tools continue to simplify development, despite ongoing discussions around is web development dying.
How Fast Can You Build an App With Video API?
Using a Video Conferencing API drastically reduces the time it takes to launch your application. If your team tried to build a reliable video system from scratch, it would likely take them many months or even over a year of complex engineering work. By using an API, you skip this entire development phase because the heavy lifting is already done for you. Your developers simply plug the ready-made video features into your app instead of inventing them. This efficient process allows you to finish a project in just a few weeks instead of waiting a year.
How Much It Cost to Use a Video Conferencing API?
Most video conferencing APIs operate on a business model known as Software as a Service. This means you do not have to purchase expensive physical infrastructure or servers to get started. Instead, you usually pay a fee based on how much you actually use the software. The providers track the activity on your application and bill you accordingly. This allows your costs to stay low when you are small and scale up only as your business needs grow. This flexibility prevents you from wasting money on resources you are not currently using.
Integrate All Video Features In Your Software With inAPI
If you are looking for a video conferencing API provider who can help you build your application, you should consider using inAPI by InstaVC. This is a cloud based video call api that allows businesses to add video communication api features directly to their own websites or apps. It acts like a bridge that connects your software to their powerful video technology.
inAPI is a remote meeting api that provides a video conference api for apps that developers can plug straight into your code. You do not need to build the video technology yourself. Because it is hosted on the cloud, you can access it over the internet and start using it right away without buying physical servers.
You can start using inAPI today to transform your software. Contact our team now to request your access keys and see how easy it is to get started.
FAQ
FAQWhat is a Video Conferencing API?
A Video Conferencing API is a pre-made software tool that lets you add video calling features to your app or website. It acts like a digital building block so developers do not have to build the technology from scratch. This allows you to launch video applications much faster.
How does a Video Conferencing API work?
The API creates a secure digital connection between two devices over the internet. It shrinks large video files into small data bundles so they can travel quickly without freezing. It also keeps the audio and video perfectly synchronized so the sound matches the image.
What are the key features of a Video Conferencing API?
Most APIs come with essential tools like high-definition video, screen sharing, and real-time chat. They also include features for recording meetings and managing participants, such as muting microphones.
What is the difference between a Video API and a Video SDK?
The API is the engine that handles the connection and data transfer behind the scenes. The SDK, or Software Development Kit, is the package of code and tools you actually download and install to build the features.
How secure are Video Conferencing APIs?
These APIs are very secure because they create a private digital tunnel for every call. The provider manages complex security tasks to ensure that only invited guests can join the meeting.
Can I integrate a Video Conferencing API into mobile and web applications?
Yes, these APIs are built to work smoothly on both mobile apps and web browsers. They contain specific code that allows the video to function on phones, tablets, and computers. This ensures your users can join a call from any device they prefer.
How do I choose the right Video Conferencing API for my needs?
You should look for a provider that offers clear documentation and a pricing model that fits your budget. Make sure they offer the specific features you need, such as recording or screen sharing. It is also smart to test their connection quality before you commit.
Trying to choose your first virtual classroom software? The market is crowded, and every option claims to be the best. It’s easy to feel overwhelmed and almost impossible to know where to even start. Picking the wrong tool isn’t just frustrating—it costs you time, money, and can lead to a poor experience for your learners.
But it doesn’t have to be that way. The answer to how to choose the best virtual classroom software solution is a structured process. We’ve broken down the entire decision-making process into a simple, 13-step action plan. By following these steps, you’ll move from being overwhelmed to being in control, and you’ll end up with the perfect virtual classroom platform for your needs.
To make the process clear, we’ve broken down the entire decision-making journey into four main stages. Here are the stages you will go through, along with the specific actions you’ll take in each one.
Stage 1: The Definition and Planning Phase
This first stage is all about internal work. Before you even look at a single product, you must define exactly what you need, for whom, and what your limits are.
Actions in this stage:
Defining your specific teaching and learning needs.
Defining the audience needs.
Listing the essential features the software must have.
Determining the technical requirements.
Setting a clear budget and a timeline.
Stage 2: The Market Research and Shortlisting Phase
Once you know your requirements, you move into the “discovery” phase. Here, you’ll explore the market to see what online classroom software exists and filter out the ones that don’t match your core needs.
Actions in this stage:
Researching the market to identify potential software vendors.
Comparing the features of different vendors against your needs.
Shortlisting the top 3-5 potential solutions.
Stage 3: The Deep Evaluation and Testing Phase
This is the most hands-on stage. You will take your short list and put the software to the test. The goal is to see how the software works in practice and how it fits with your existing tools and team.
Actions in this stage:
Testing the shortlisted software through free trials or live demos.
Checking how the software integrates with your other essential tools.
Evaluating the quality of the vendor’s customer and technical support.
Stage 4: The Final Selection and Procurement Phase
In the final stage, your testing is complete, and you are ready to make a business decision. This phase is about finalizing the cost, the terms, and making your final choice.
Actions in this stage:
Requesting final price quotes and negotiating terms.
Making the final selection.
13-Step Checklist for Selecting the Right Virtual Classroom Software
The entire process of choosing your first virtual classroom solution can be grouped into four main stages. However, navigating those stages requires a clear set of actions. To help you get it right, we’ve broken the entire stages into 13 essential action steps. Let’s see them in more detail.
Step #1. Defining Your Specific Teaching and Learning Needs
Before you look at any online teaching software for remote learning, you must know how you plan to teach. If you don’t know how you teach, you can’t find a tool that supports your style. The biggest mistake is buying software and then being forced to change your teaching methods to fit its limits. So, it’s important to get clear about the most important teaching activities.
Here’s the exercise you can do: Write a 5-sentence story of your ideal lesson. (e.g., “I greet 20 students. I present my slides for 10 minutes. Then, I split them into 4-person groups to use the interactive whiteboard software for a 15-minute activity. I jump between groups to check their work. Finally, we all come back, and one group presents their findings.”)
Step #2. Defining the Audience Needs
The software you are choosing is for your learners. If you want to see how virtual classroom solutions improve online learning, it starts here. If they struggle with the technology, your class will struggle before it even starts. So the software must be easy for your learners to use.
To get clear about your audience, you need to create a simple “Learner Persona”. You can create this by asking simple questions like, How tech-savvy are they, on a scale of 1 to 10? What device will they realistically use? Are they young students who need big, simple buttons and a visual interface? Are they business professionals who will be joining from their mobile phones?
Step #3. Setting a Clear Budget and a Timeline
This step is about setting realistic boundaries. Your budget and timeline are the two main constraints that will focus your search. Without a clear budget, you will waste hours researching and testing software you simply can’t afford. Without a firm timeline, your project will drift for months without a clear end date.
For Your Budget: Decide on a maximum price you are willing to pay, whether that’s per month or per year. You must also look for the Total Cost of Ownership (TCO).
For Your Timeline: Set a firm deadline for when you need the software to be fully operational. The best way to do this is to work backward from your “go-live” date.
A clear budget stops you from wasting time, and a clear timeline keeps your project moving forward.
Step #4. Determining the Technical Requirements
This is a crucial part of your initial planning. It’s about accessibility and security. This step ensures the solution you eventually pick will actually work for your audience (accessibility) and that their data will be safe (security). As part of your planning, you need to answer these technical questions.
Access: Do you need a tool that works instantly in a web browser, or does it require all your students to install an app?
Devices: What devices will your audience realistically use?
Bandwidth: Your requirements list should include the need for a stable experience on average or even weaker internet. This means you’ll later look for features like a “low-bandwidth mode.”
Security: Your list of requirements must include your security standards and the provider must be compliant with standards like GDPR or FERPA.
Step #5. Researching the Market to Identify Potential Software Vendors
This is the moment you move from internal planning to market research. The market for online education platforms is filled with options that all sound the same. You need a smart process to find the right vendors. Your goal here is to build a list of 10-15 vendors that seem relevant. This list is what you will filter down later.
Here are a few tactics to go beyond a simple web search:
Be a Specific Searcher: Don’t just search for “virtual classroom software.” Use the needs you defined in Steps 1 and 2 to get better results. For example, search for ‘virtual classroom for language tutors,’ ‘collaborative whiteboard for engineering,’ or ‘online training platforms for corporate use.
Use Review Sites: Go to business software review sites like techimply, G2, Capterra, and TrustRadius. You can filter by category and company size.
Step #6. Listing the Essential Features the Software Must Have
This step is where you translate your needs into a concrete checklist. This list is what separates basic video tools from true online teaching platforms for virtual learning, and it protects you from ‘shiny object syndrome. With an AI Video Generator, educators can create high-quality instructional videos more efficiently and support a more engaging learning experience.
There is a tendency in the software world to get distracted by a flashy, exciting feature that people never use. This list is your best way to do this: sort your feature list into categories of importance.
To create your simple list, start with the following MoSCoW exercise. When you finish this exercise, your “Must Have” list becomes your primary shopping list.
M – Must Have: These are your non-negotiable, deal-breaker features. If the software does not have this, it is disqualified.
S – Should Have: These are important features that add significant value, but are not immediate deal-breakers. You would strongly prefer to have them.
C – Could Have: These are the “nice-to-have” features. They are bonuses that might set one vendor apart from another, but they are not critical to your daily operations.
W – Won’t Have (This Time): These are features you’ve explicitly decided you do not need right now. This is just as important as the “Must Have” list because it keeps you focused on your budget and core purpose.
Step #7. Comparing the Features of Different Vendors Against Your Needs
This is the step where you will create your comparison spreadsheet. This sheet is the key to identifying the features of a good virtual classroom software for you. This step is important because this sheet is what you will use to finalize your software vendors. This simple spreadsheet will very quickly reveal which vendors are not a good fit.
To create such a sheet, start by creating a column to list all of your “Must Have” features from Step 6. Then use rows to list the names of the 10-15 vendors from your research in step 5. Now go to each vendor’s website, look at their “features” page, and compare it with yours to fill “Yes” or “No” in your comparison sheet.
Step #8. Shortlisting the Top 3-5 Potential Solutions
This is the payoff for all your hard work in the previous steps. You cannot, and should not, do a full test and demo of 15 different products. It would be a huge waste of time. The goal of this step is to narrow your focus to a small, manageable group of the best contenders so you can invest your time wisely. Your goal is to get this list down to no more than 3-5 options. These are the only vendors you will spend significant time hands-on testing.
To do this, pull out the comparison spreadsheet you have created in step 7. Then check which vendor has a “No” in one of your “Must Have” rows. Any vendor that you see has a “No” next to even one of your non-negotiable features, you should immediately disqualify them. This is the fastest way to clean up your list.
Step #9. Testing the Shortlisted Software Through Free Trials or Live Demos
Here is a piece of advice: Never buy software based on a sales pitch or a feature list alone. A feature list on a website is not the same as real-world experience. A sales demo is designed to show you only the parts of the software that work perfectly. A free trial is where you discover the reality, like what works, and what doesn’t.
You will have two main ways to test your 3-5 shortlisted solutions.
First, FREE TRIAL: Always sign up for a free trial if one is offered. This lets you use the real product on your own time, without a salesperson watching. We recommend getting a colleague to log in as a “student,” to see how it feels for them.
Second, see the live demo: If a trial isn’t available, then request a live, custom demo. Our recommendation is not to sit back and watch their standard sales script. Be firm and tell them to demonstrate your “Must-Have” features list. This forces them to show you the features you care about, not just the flashy ones they want to sell.
Step #10. Checking How the Software Integrates with Your Other Essential Tools
During your free trial, you must investigate the “Integrations” of the software. “Integration” means how well the new software connects to other software you already use to run your school or business. This step is critical because if the software doesn’t connect well, you have to do all those small tasks manually, which is going to waste a lot of your time.
So, here check if the software can connect to your:
Calendar Integration: Your software should automatically add new classes to your Google or Outlook calendar.
LMS Integration: Does it connect to your existing Learning Management System (LMS)? If you don’t have one, you can ask vendors what they consider the best learning management system to pair with their tool.
Payment Integration: It should connect to payment tools like Stripe or PayPal to auto-enroll paid students.
Storage Integration: You should be able to easily pull files to share from your Google Drive, Dropbox, or OneDrive.
Email Integration: The system should send automatic confirmation and reminder emails to your students.
Website Integration: You should be able to place a signup form on your website that adds students directly to a class.
Step #11. Evaluating the Quality of the Vendor’s Customer and Technical Support
Most people, when they buy software, think they are just buying a tool. But reality is that you are also buying a service. Good support is just as important as good features. When something goes wrong in the middle of a class, you need to know that you can get help quickly. So you must test the support team before you need them. Do not assume that because the sales team is fast, the technical support team will be.
Our recommendation is to test Every Support Channel they offer:
Send an email: Ask a specific, but not urgent, question. How many hours (or days) does it take to get a helpful, human reply?
Use the live chat: If they have a support chat, use it. Is it a real person or just a frustrating bot?
Search the help center: Try to find an answer to a question on your own. Is their “knowledge base” easy to search and filled with clear, helpful articles?
Step #12. Requesting Final Price Quotes and Negotiating Terms
You have now finished your testing and have likely identified your top 1-2 choices. It is time to contact their sales team to move towards buying the software. When you contact them, tell them exactly what you need and ask for a final, official quote in writing. This locks in the price and ensures there are no misunderstandings.
But pay very careful attention to the price that they have quoted. The price that you see on the public website is often just a starting point and may not be the final, total cost. You must pay attention to all the terms before you sign. Many software contracts will automatically lock you in for another full year unless you provide written notice 60 or 90 days in advance.
Once you have the quote, don’t be afraid to negotiate. It is a standard business practice to ask if they offer any discounts. You can often get a better price by asking for reductions based on paying for a full year upfront, or by seeing if they have special pricing for educational institutions, non-profits, or startups.
Step #13. Making the Final Selection
This is the final step where all your research, planning, and testing come together to make a confident decision. It is now time to make that final selection, sign the contract you carefully reviewed, and begin the process of implementing your new virtual classroom platform.
Once that contract is signed, your focus should immediately shift from “selection” to “implementation.” Your very next action should be to contact the vendor to schedule your onboarding or training session.
The faster you and your team are trained, the more comfortable you will be with the platform, and the sooner you can start delivering the high-quality learning experiences that started this entire process.
Choose Your Virtual Classroom Software with Certainty
Choosing your first virtual classroom software is a significant decision. The search for the best online learning platforms can be stressful, but it doesn’t have to be. By following this 13-step process, you have replaced guesswork with a structured plan. With this plan, you are certainly making a confident choice. This method protects you from making a costly mistake and ensures the tool you select truly fits your teaching style and your students’ needs. You’ve done the hard work, and you are now fully prepared to select the right solution and start teaching.
FAQs
FAQWhat is a virtual meeting for educators?
Virtual classroom software is an online tool built for teaching. It lets teachers and students interact live in a shared digital space. It includes special features for learning, like interactive whiteboards, polls, and breakout rooms.
Which is the best Virtual Classroom Software for 2025?
There is no single “best” software, as the right choice depends on your specific needs. The best tool for you is the one that fits your teaching style, audience, and budget. Popular, highly-rated options often include Blackboard Collaborate, Adobe Connect, and specialized platforms like ClassIn.
What features should I look for when choosing a Virtual Classroom Software?
Look for features that support how you teach. The most important ones are usually interactive whiteboards, breakout rooms for group work, and screen sharing. You should also check for tools like polls, quizzes, and class recording.
Why is Virtual Classroom Software important for online education?
It is important because it brings the live, interactive feel of a real classroom online. It allows teachers and students to talk, share ideas, and work together in real-time. This makes learning much more engaging than just watching pre-recorded videos.
How is Virtual Classroom Software different from a regular video conferencing tool?
Regular video conferencing tools (like Zoom or Google Meet) are built for general meetings. Virtual classroom software is built specifically for teaching. It has learning-focused features like quizzes, hand-raising, and persistent whiteboards that meeting tools do not.
Can Virtual Classroom Software integrate with Learning Management Systems (LMS)?
Yes, most virtual classroom tools are designed to connect with an LMS. This connection makes it easy to schedule classes, manage student lists, and post grades. It helps keep all your teaching tools in one place.
What are the benefits of using Virtual Classroom Software for institutions?
Institutions can teach students from anywhere in the world, giving more people access to education. It helps save money on physical buildings and travel. It also allows them to record lessons so students can review the material at any time.
Is Virtual Classroom Software suitable for corporate training as well?
Yes, it is very effective for corporate training. Companies use it to train employees who are in different offices or working from home. It is a good way to handle employee onboarding, teach new skills, and make sure all team members get the same training.
who work in different offices or from home. It is a cost-effective way to run workshops, onboard new hires, and teach new skills to a large team.