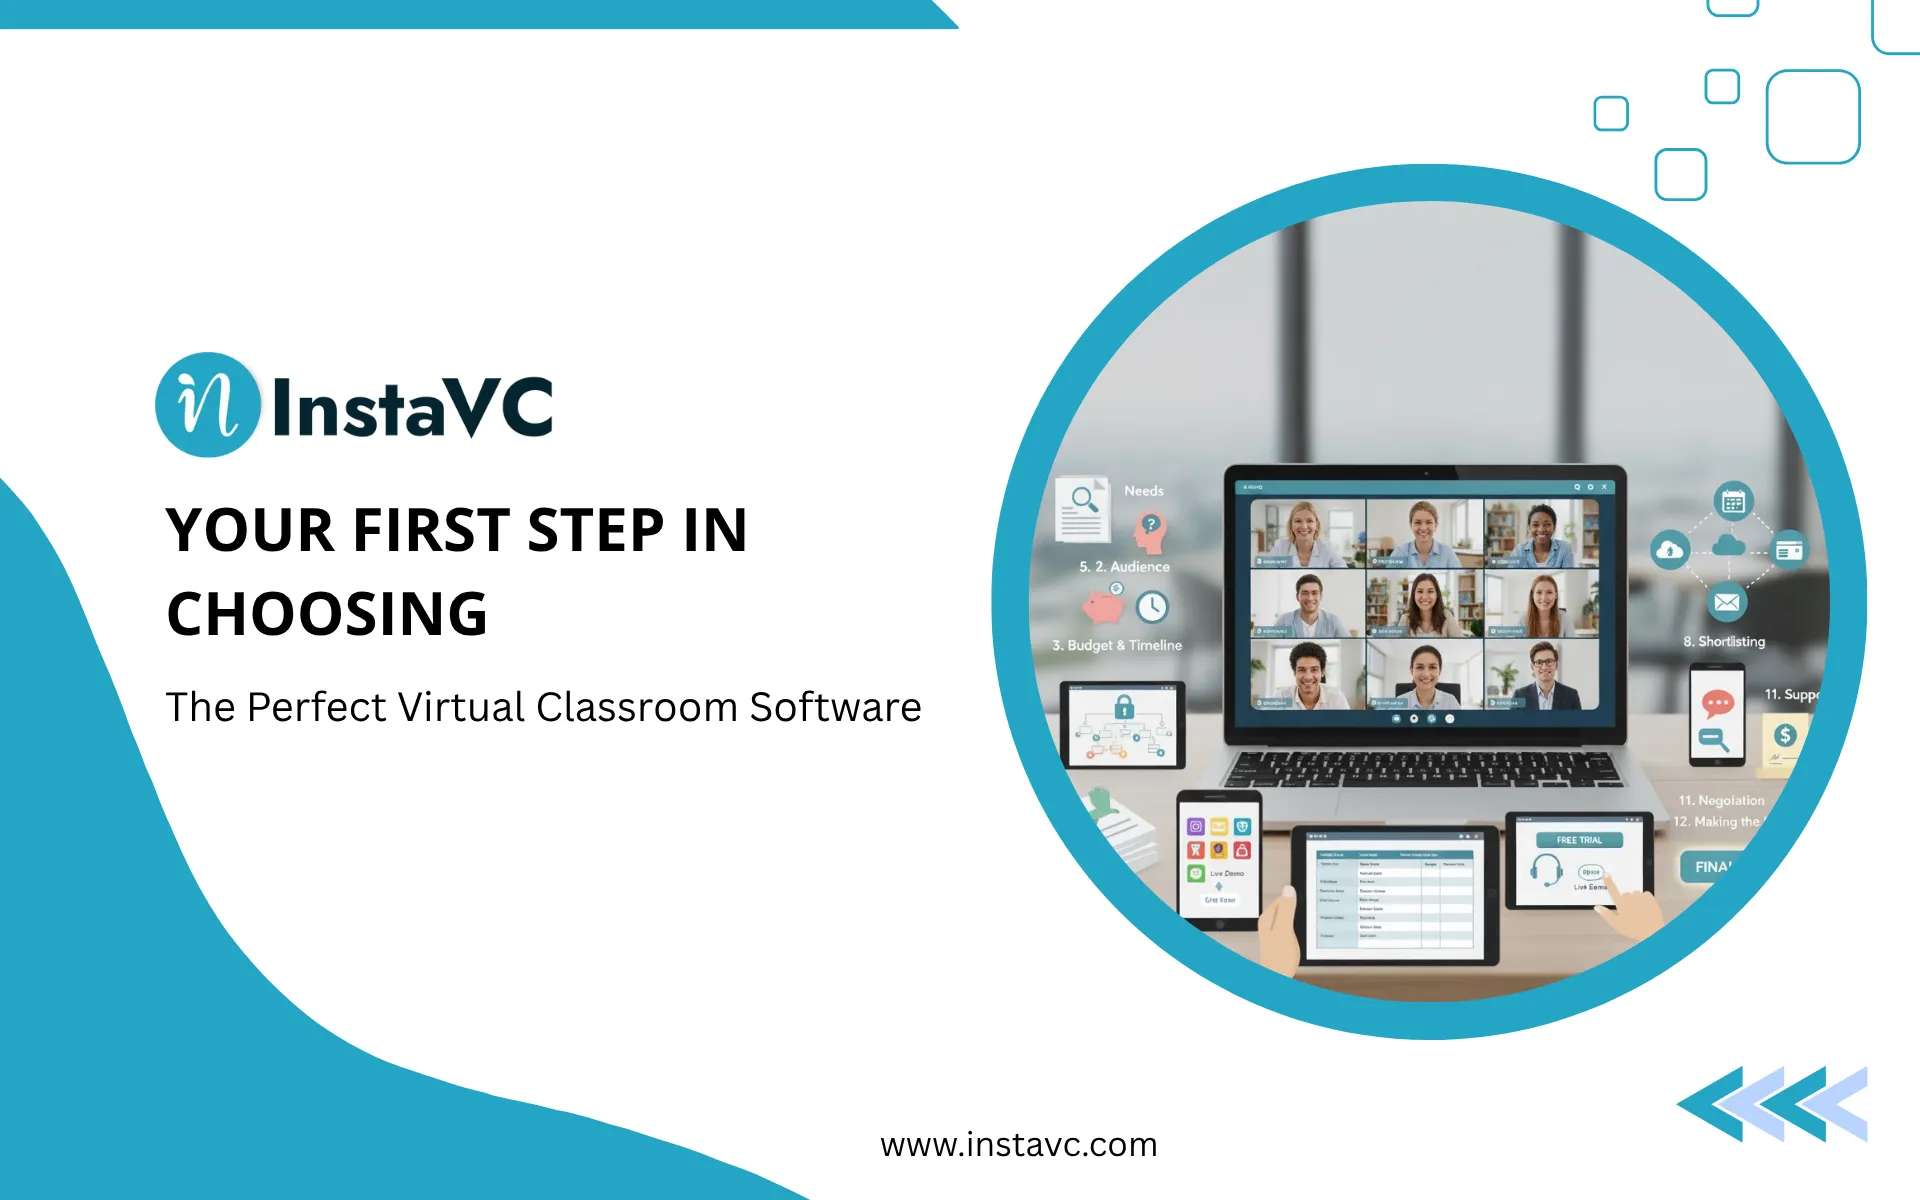
Trying to choose your first virtual classroom software? The market is crowded, and every option claims to be the best. It’s easy to feel overwhelmed and almost impossible to know where to even start. Picking the wrong tool isn’t just frustrating—it costs you time, money, and can lead to a poor experience for your learners.
But it doesn’t have to be that way. The answer to how to choose the best virtual classroom software solution is a structured process. We’ve broken down the entire decision-making process into a simple, 13-step action plan. By following these steps, you’ll move from being overwhelmed to being in control, and you’ll end up with the perfect virtual classroom platform for your needs.
Table of Contents
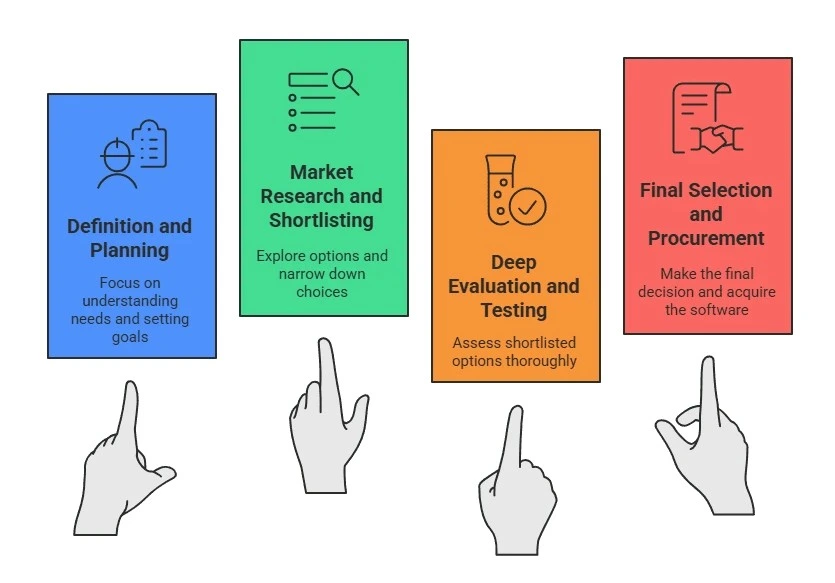
The 4-Stage Framework for Choosing Your Software
- Stage 1: The Definition and Planning Phase
- Stage 2: The Market Research and Shortlisting Phase
- Stage 3: The Deep Evaluation and Testing Phase
- Stage 4: The Final Selection and Procurement Phase
13-Step Checklist for Selecting the Right Virtual Classroom Software
- Step 1. Defining Your Specific Teaching and Learning Needs
- Step 2. Defining the Audience Needs
- Step 3. Setting a Clear Budget and a Timeline
- Step 4. Determining the Technical Requirements
- Step 5. Researching the Market to Identify Potential Software Vendors
- Step 6. Listing the Essential Features the Software Must Have
- Step 7. Comparing the Features of Different Vendors Against Your Needs
- Step 8. Shortlisting the Top 3-5 Potential Solutions
- Step 9. Testing the Shortlisted Software Through Free Trials or Live Demos
- Step 10. Checking How the Software Integrates with Your Other Essential Tools
- Step 11. Evaluating the Quality of the Vendor’s Customer and Technical Support
- Step 12. Requesting Final Price Quotes and Negotiating Terms
- Step 13. Making the Final Selection
Choose Your Virtual Classroom Software with Certainty
Frequently Asked Questions (FAQs)
The 4-Stage Framework for Choosing Your Software
To make the process clear, we’ve broken down the entire decision-making journey into four main stages. Here are the stages you will go through, along with the specific actions you’ll take in each one.
Stage 1: The Definition and Planning Phase
This first stage is all about internal work. Before you even look at a single product, you must define exactly what you need, for whom, and what your limits are.
Actions in this stage:
- Defining your specific teaching and learning needs.
- Defining the audience needs.
- Listing the essential features the software must have.
- Determining the technical requirements.
- Setting a clear budget and a timeline.
Stage 2: The Market Research and Shortlisting Phase
Once you know your requirements, you move into the “discovery” phase. Here, you’ll explore the market to see what online classroom software exists and filter out the ones that don’t match your core needs.
Actions in this stage:
- Researching the market to identify potential software vendors.
- Comparing the features of different vendors against your needs.
- Shortlisting the top 3-5 potential solutions.
Stage 3: The Deep Evaluation and Testing Phase
This is the most hands-on stage. You will take your short list and put the software to the test. The goal is to see how the software works in practice and how it fits with your existing tools and team.
Actions in this stage:
- Testing the shortlisted software through free trials or live demos.
- Checking how the software integrates with your other essential tools.
- Evaluating the quality of the vendor’s customer and technical support.
Stage 4: The Final Selection and Procurement Phase
In the final stage, your testing is complete, and you are ready to make a business decision. This phase is about finalizing the cost, the terms, and making your final choice.
Actions in this stage:
- Requesting final price quotes and negotiating terms.
- Making the final selection.
13-Step Checklist for Selecting the Right Virtual Classroom Software
The entire process of choosing your first virtual classroom solution can be grouped into four main stages. However, navigating those stages requires a clear set of actions. To help you get it right, we’ve broken the entire stages into 13 essential action steps. Let’s see them in more detail.
Step #1. Defining Your Specific Teaching and Learning Needs
Before you look at any online teaching software for remote learning, you must know how you plan to teach. If you don’t know how you teach, you can’t find a tool that supports your style. The biggest mistake is buying software and then being forced to change your teaching methods to fit its limits. So, it’s important to get clear about the most important teaching activities.
Here’s the exercise you can do: Write a 5-sentence story of your ideal lesson. (e.g., “I greet 20 students. I present my slides for 10 minutes. Then, I split them into 4-person groups to use the interactive whiteboard software for a 15-minute activity. I jump between groups to check their work. Finally, we all come back, and one group presents their findings.”)
Step #2. Defining the Audience Needs
The software you are choosing is for your learners. If you want to see how virtual classroom solutions improve online learning, it starts here. If they struggle with the technology, your class will struggle before it even starts. So the software must be easy for your learners to use.
To get clear about your audience, you need to create a simple “Learner Persona”. You can create this by asking simple questions like, How tech-savvy are they, on a scale of 1 to 10? What device will they realistically use? Are they young students who need big, simple buttons and a visual interface? Are they business professionals who will be joining from their mobile phones?
Step #3. Setting a Clear Budget and a Timeline
This step is about setting realistic boundaries. Your budget and timeline are the two main constraints that will focus your search. Without a clear budget, you will waste hours researching and testing software you simply can’t afford. Without a firm timeline, your project will drift for months without a clear end date.
- For Your Budget: Decide on a maximum price you are willing to pay, whether that’s per month or per year. You must also look for the Total Cost of Ownership (TCO).
- For Your Timeline: Set a firm deadline for when you need the software to be fully operational. The best way to do this is to work backward from your “go-live” date.
A clear budget stops you from wasting time, and a clear timeline keeps your project moving forward.
Step #4. Determining the Technical Requirements
This is a crucial part of your initial planning. It’s about accessibility and security. This step ensures the solution you eventually pick will actually work for your audience (accessibility) and that their data will be safe (security). As part of your planning, you need to answer these technical questions.
- Access: Do you need a tool that works instantly in a web browser, or does it require all your students to install an app?
- Devices: What devices will your audience realistically use?
- Bandwidth: Your requirements list should include the need for a stable experience on average or even weaker internet. This means you’ll later look for features like a “low-bandwidth mode.”
- Security: Your list of requirements must include your security standards and the provider must be compliant with standards like GDPR or FERPA.
Step #5. Researching the Market to Identify Potential Software Vendors
This is the moment you move from internal planning to market research. The market for online education platforms is filled with options that all sound the same. You need a smart process to find the right vendors. Your goal here is to build a list of 10-15 vendors that seem relevant. This list is what you will filter down later.
Here are a few tactics to go beyond a simple web search:
- Be a Specific Searcher: Don’t just search for “virtual classroom software.” Use the needs you defined in Steps 1 and 2 to get better results. For example, search for ‘virtual classroom for language tutors,’ ‘collaborative whiteboard for engineering,’ or ‘online training platforms for corporate use.
- Use Review Sites: Go to business software review sites like techimply, G2, Capterra, and TrustRadius. You can filter by category and company size.
Step #6. Listing the Essential Features the Software Must Have
This step is where you translate your needs into a concrete checklist. This list is what separates basic video tools from true online teaching platforms for virtual learning, and it protects you from ‘shiny object syndrome. With an AI Video Generator, educators can create high-quality instructional videos more efficiently and support a more engaging learning experience.
There is a tendency in the software world to get distracted by a flashy, exciting feature that people never use. This list is your best way to do this: sort your feature list into categories of importance.
To create your simple list, start with the following MoSCoW exercise. When you finish this exercise, your “Must Have” list becomes your primary shopping list.
- M – Must Have: These are your non-negotiable, deal-breaker features. If the software does not have this, it is disqualified.
- S – Should Have: These are important features that add significant value, but are not immediate deal-breakers. You would strongly prefer to have them.
- C – Could Have: These are the “nice-to-have” features. They are bonuses that might set one vendor apart from another, but they are not critical to your daily operations.
- W – Won’t Have (This Time): These are features you’ve explicitly decided you do not need right now. This is just as important as the “Must Have” list because it keeps you focused on your budget and core purpose.
Step #7. Comparing the Features of Different Vendors Against Your Needs
This is the step where you will create your comparison spreadsheet. This sheet is the key to identifying the features of a good virtual classroom software for you. This step is important because this sheet is what you will use to finalize your software vendors. This simple spreadsheet will very quickly reveal which vendors are not a good fit.
To create such a sheet, start by creating a column to list all of your “Must Have” features from Step 6. Then use rows to list the names of the 10-15 vendors from your research in step 5. Now go to each vendor’s website, look at their “features” page, and compare it with yours to fill “Yes” or “No” in your comparison sheet.
Step #8. Shortlisting the Top 3-5 Potential Solutions
This is the payoff for all your hard work in the previous steps. You cannot, and should not, do a full test and demo of 15 different products. It would be a huge waste of time. The goal of this step is to narrow your focus to a small, manageable group of the best contenders so you can invest your time wisely. Your goal is to get this list down to no more than 3-5 options. These are the only vendors you will spend significant time hands-on testing.
To do this, pull out the comparison spreadsheet you have created in step 7. Then check which vendor has a “No” in one of your “Must Have” rows. Any vendor that you see has a “No” next to even one of your non-negotiable features, you should immediately disqualify them. This is the fastest way to clean up your list.
Step #9. Testing the Shortlisted Software Through Free Trials or Live Demos
Here is a piece of advice: Never buy software based on a sales pitch or a feature list alone. A feature list on a website is not the same as real-world experience. A sales demo is designed to show you only the parts of the software that work perfectly. A free trial is where you discover the reality, like what works, and what doesn’t.
You will have two main ways to test your 3-5 shortlisted solutions.
- First, FREE TRIAL: Always sign up for a free trial if one is offered. This lets you use the real product on your own time, without a salesperson watching. We recommend getting a colleague to log in as a “student,” to see how it feels for them.
- Second, see the live demo: If a trial isn’t available, then request a live, custom demo. Our recommendation is not to sit back and watch their standard sales script. Be firm and tell them to demonstrate your “Must-Have” features list. This forces them to show you the features you care about, not just the flashy ones they want to sell.
Step #10. Checking How the Software Integrates with Your Other Essential Tools
During your free trial, you must investigate the “Integrations” of the software. “Integration” means how well the new software connects to other software you already use to run your school or business. This step is critical because if the software doesn’t connect well, you have to do all those small tasks manually, which is going to waste a lot of your time.
So, here check if the software can connect to your:
- Calendar Integration: Your software should automatically add new classes to your Google or Outlook calendar.
- LMS Integration: Does it connect to your existing Learning Management System (LMS)? If you don’t have one, you can ask vendors what they consider the best learning management system to pair with their tool.
- Payment Integration: It should connect to payment tools like Stripe or PayPal to auto-enroll paid students.
- Storage Integration: You should be able to easily pull files to share from your Google Drive, Dropbox, or OneDrive.
- Email Integration: The system should send automatic confirmation and reminder emails to your students.
- Website Integration: You should be able to place a signup form on your website that adds students directly to a class.
Step #11. Evaluating the Quality of the Vendor’s Customer and Technical Support
Most people, when they buy software, think they are just buying a tool. But reality is that you are also buying a service. Good support is just as important as good features. When something goes wrong in the middle of a class, you need to know that you can get help quickly. So you must test the support team before you need them. Do not assume that because the sales team is fast, the technical support team will be.
Our recommendation is to test Every Support Channel they offer:
- Send an email: Ask a specific, but not urgent, question. How many hours (or days) does it take to get a helpful, human reply?
- Use the live chat: If they have a support chat, use it. Is it a real person or just a frustrating bot?
- Search the help center: Try to find an answer to a question on your own. Is their “knowledge base” easy to search and filled with clear, helpful articles?
Step #12. Requesting Final Price Quotes and Negotiating Terms
You have now finished your testing and have likely identified your top 1-2 choices. It is time to contact their sales team to move towards buying the software. When you contact them, tell them exactly what you need and ask for a final, official quote in writing. This locks in the price and ensures there are no misunderstandings.
But pay very careful attention to the price that they have quoted. The price that you see on the public website is often just a starting point and may not be the final, total cost. You must pay attention to all the terms before you sign. Many software contracts will automatically lock you in for another full year unless you provide written notice 60 or 90 days in advance.
Once you have the quote, don’t be afraid to negotiate. It is a standard business practice to ask if they offer any discounts. You can often get a better price by asking for reductions based on paying for a full year upfront, or by seeing if they have special pricing for educational institutions, non-profits, or startups.
Step #13. Making the Final Selection
This is the final step where all your research, planning, and testing come together to make a confident decision. It is now time to make that final selection, sign the contract you carefully reviewed, and begin the process of implementing your new virtual classroom platform.
Once that contract is signed, your focus should immediately shift from “selection” to “implementation.” Your very next action should be to contact the vendor to schedule your onboarding or training session.
The faster you and your team are trained, the more comfortable you will be with the platform, and the sooner you can start delivering the high-quality learning experiences that started this entire process.
Choose Your Virtual Classroom Software with Certainty
Choosing your first virtual classroom software is a significant decision. The search for the best online learning platforms can be stressful, but it doesn’t have to be. By following this 13-step process, you have replaced guesswork with a structured plan. With this plan, you are certainly making a confident choice. This method protects you from making a costly mistake and ensures the tool you select truly fits your teaching style and your students’ needs. You’ve done the hard work, and you are now fully prepared to select the right solution and start teaching.
FAQs
What is a virtual meeting for educators?
Virtual classroom software is an online tool built for teaching. It lets teachers and students interact live in a shared digital space. It includes special features for learning, like interactive whiteboards, polls, and breakout rooms.
Which is the best Virtual Classroom Software for 2025?
There is no single “best” software, as the right choice depends on your specific needs. The best tool for you is the one that fits your teaching style, audience, and budget. Popular, highly-rated options often include Blackboard Collaborate, Adobe Connect, and specialized platforms like ClassIn.
What features should I look for when choosing a Virtual Classroom Software?
Look for features that support how you teach. The most important ones are usually interactive whiteboards, breakout rooms for group work, and screen sharing. You should also check for tools like polls, quizzes, and class recording.
Why is Virtual Classroom Software important for online education?
It is important because it brings the live, interactive feel of a real classroom online. It allows teachers and students to talk, share ideas, and work together in real-time. This makes learning much more engaging than just watching pre-recorded videos.
How is Virtual Classroom Software different from a regular video conferencing tool?
Regular video conferencing tools (like Zoom or Google Meet) are built for general meetings. Virtual classroom software is built specifically for teaching. It has learning-focused features like quizzes, hand-raising, and persistent whiteboards that meeting tools do not.
Can Virtual Classroom Software integrate with Learning Management Systems (LMS)?
Yes, most virtual classroom tools are designed to connect with an LMS. This connection makes it easy to schedule classes, manage student lists, and post grades. It helps keep all your teaching tools in one place.
What are the benefits of using Virtual Classroom Software for institutions?
Institutions can teach students from anywhere in the world, giving more people access to education. It helps save money on physical buildings and travel. It also allows them to record lessons so students can review the material at any time.
Is Virtual Classroom Software suitable for corporate training as well?
Yes, it is very effective for corporate training. Companies use it to train employees who are in different offices or working from home. It is a good way to handle employee onboarding, teach new skills, and make sure all team members get the same training. who work in different offices or from home. It is a cost-effective way to run workshops, onboard new hires, and teach new skills to a large team.
Leave a Reply